The Hooters Chocolate Mousse Cake Recipe is famous for its decadent chocolate layers and smooth mousse, making it one of the most talked-about desserts served at Hooters locations..
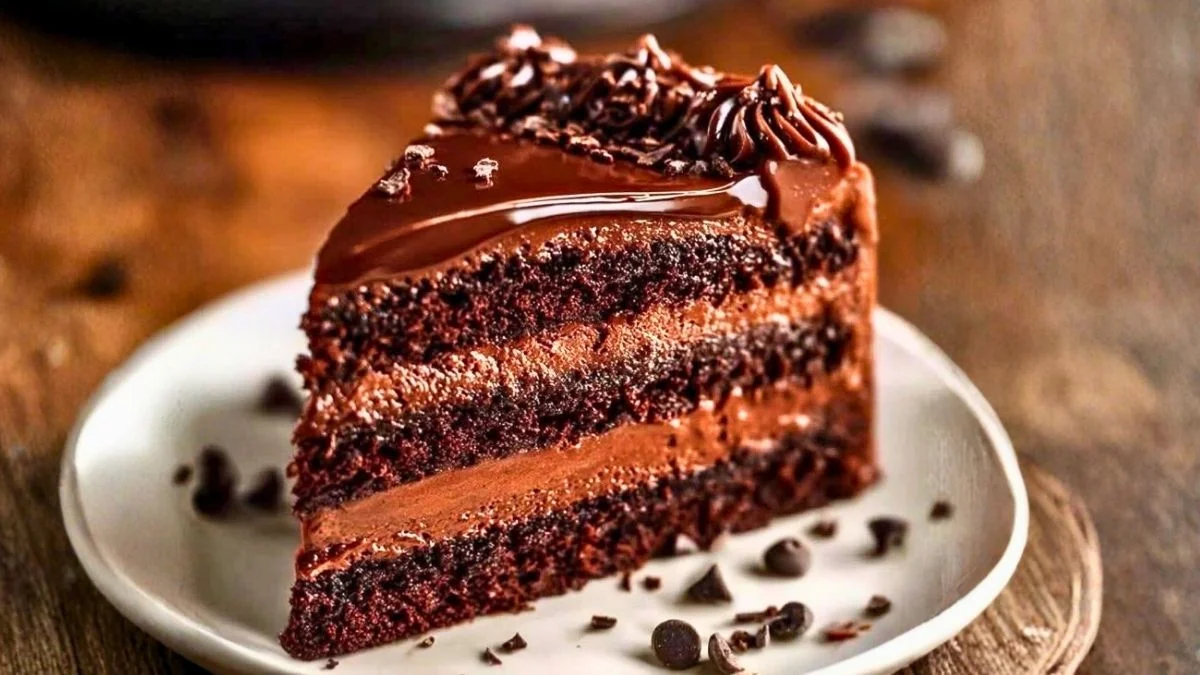
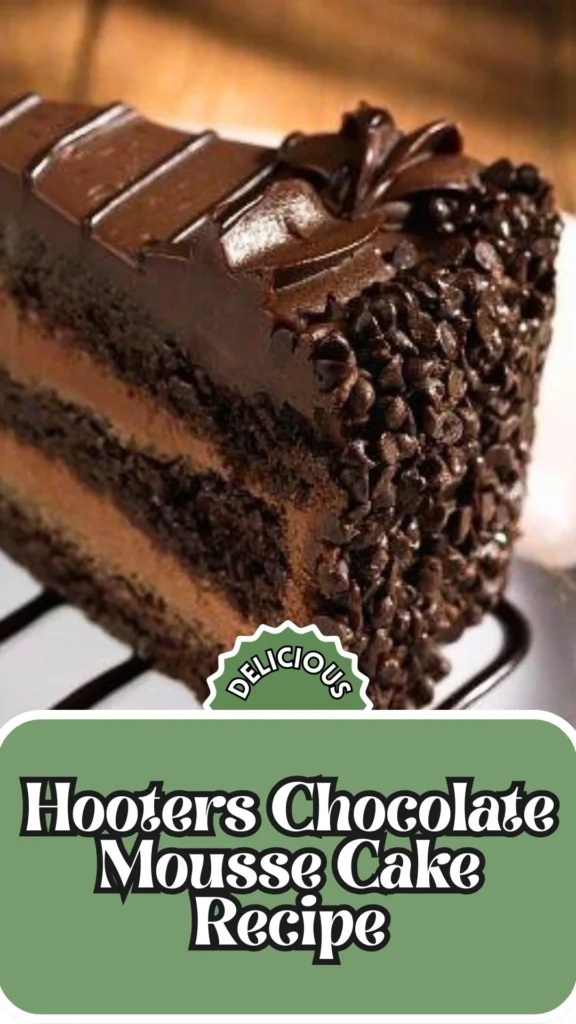
This copycat Hooters chocolate mousse cake recipe brings that restaurant-quality indulgence straight to your kitchen. With layers of fluffy chocolate sponge, silky chocolate mousse filling, and a rich ganache coating studded with chocolate chips, this showstopping dessert rivals any bakery creation.
Whether you’re recreating a Hooters birthday cake experience or simply craving the best chocolate mousse cake recipe ever, this step-by-step guide delivers bakery-worthy results that’ll have everyone asking for seconds.
What Does It Taste Like?
This Hooters dessert recipe is pure chocolate heaven in every bite. The moist, airy chocolate sponge cake provides a delicate foundation that melts on your tongue, while the velvety chocolate mousse filling offers luxurious creaminess with deep cocoa notes.

The whipped chocolate ganache coating adds a sophisticated bittersweet richness, perfectly balanced by the sweet crunch of chocolate chips adorning the sides.
Each forkful delivers multiple textures from the tender crumb to the cloud-like mousse and the smooth ganache creating a harmonious symphony of chocolate flavors that’s neither too sweet nor too heavy. It’s elegant, decadent, and utterly irresistible.
Ingredients and Kitchen Utensils
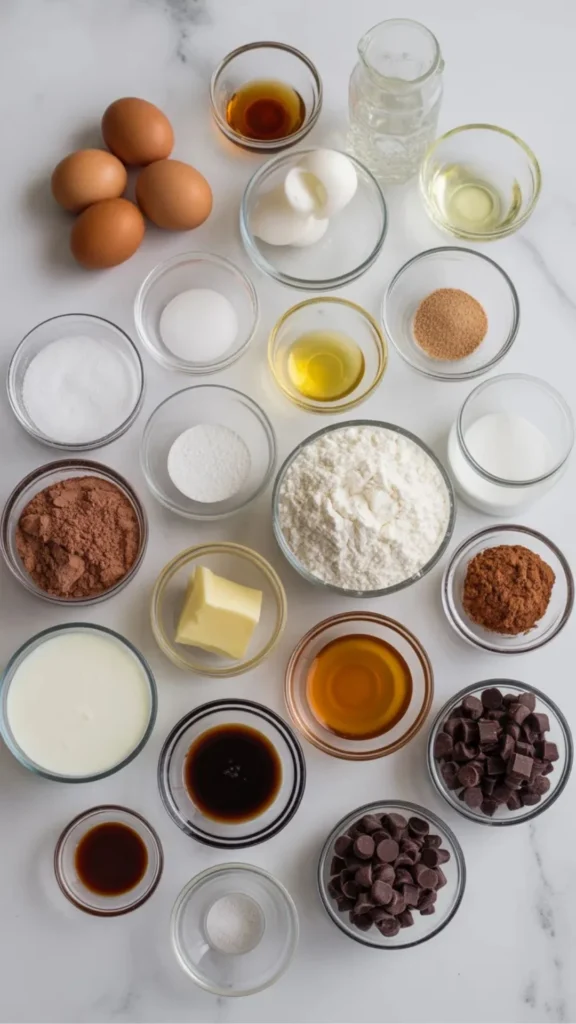
Hooters Chocolate Mousse Cake Recipe Ingredients
For the Chocolate Sponge Cake:
- 3-4 large eggs (at room temperature)
- 1 teaspoon vanilla extract
- ¾ cup granulated sugar
- ½ cup vegetable oil (or neutral oil)
- 2 teaspoons baking powder
- Pinch of salt
- 1½ cups all-purpose flour (divided)
- ⅓ cup cocoa powder
- ¾ cup naturally fermented milk kefir (or substitute with plain yogurt or buttermilk)
- Extra cocoa powder for dusting the pan
The Simple Syrup:
- ½ cup water
- ¼ cup sugar
The Chocolate Mousse Filling:
- 2 cups heavy whipping cream (cold)
- 2 teaspoons unflavored gelatin
- 3 tablespoons cold water
- 6 ounces dark or semi-sweet chocolate (melted and slightly cooled)
And For the Chocolate Ganache and Decoration:
- 8 ounces chocolate (chopped)
- 1 cup heavy cream (warm)
- 1-1½ cups chocolate chips (for coating the sides)
Kitchen Utensils
- 9-inch springform pan
- Hand mixer or stand mixer
- Mixing bowls (various sizes)
- Rubber spatula
- Serrated knife (for cake layering)
- Acetate sheets or parchment paper strips
- Piping bag with star tip (Wilton 1M)
- Microwave-safe bowl
- Wire whisk
- Pastry brush
- Offset spatula
Preparation and Cooking Time
Prep Time: 45 minutes
Baking Time: 40-45 minutes
Chilling Time: 2 hours minimum (overnight recommended)
Total Time: 4-5 hours (including chilling)
Servings: 10-12 slices
Hooters Chocolate Mousse Cake Recipe Instructions
Step 1: Prepare the Chocolate Sponge Cake
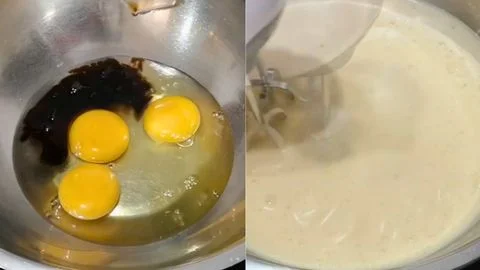
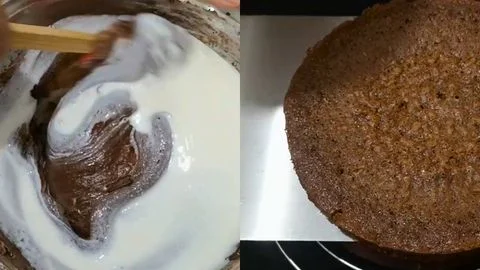
Preheat your oven to 180°C (350°F). Grease a 9-inch springform pan and dust it with cocoa powder instead of flour this keeps the cake beautifully dark. In a large mixing bowl, add eggs and vanilla extract, then beat with a hand mixer on high speed for 3-4 minutes until the mixture doubles in volume, becoming light, fluffy, and pale yellow.
Step 2: Build the Cake Batter
While continuing to beat, gradually add the sugar in a steady stream until fully incorporated. Slowly drizzle in the oil in a thin stream, allowing it to emulsify into the batter. Add the baking powder, a pinch of salt, and half of the flour (¾ cup), then gently fold using a rubber spatula to avoid deflating the batter.
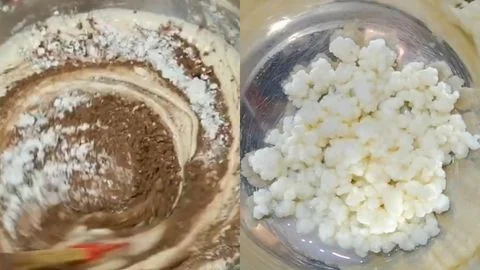
Step 3: Add Cocoa and Fermented Milk
Sift in the cocoa powder along with the remaining flour, folding carefully to maintain airiness. If using kefir grains, strain them to extract the liquid fermented milk (reserve grains for future batches). Pour the kefir liquid into the batter and mix until just combined the batter should be smooth and pourable.
Step 4: Bake the Cake
Pour the batter into your prepared pan and bake for 40-45 minutes, or until a toothpick inserted in the center comes out clean. The cake should spring back when lightly touched. Allow the cake to cool completely in the pan before removing this prevents cracking and ensures easier layering.
Step 5: Prepare the Simple Syrup
While the cake cools, combine water and sugar in a small saucepan. Heat until the sugar dissolves completely, then let it cool. This syrup keeps the cake layers moist and adds subtle sweetness.
Step 6: Make the Chocolate Mousse Filling
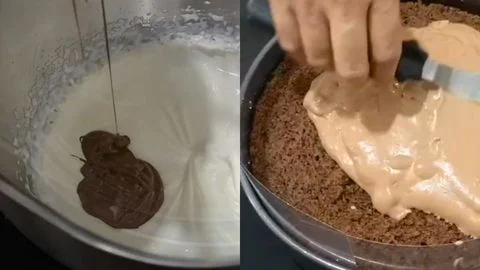
Chill your mixing bowl and whisk attachment in the freezer for 10 minutes. Sprinkle gelatin over cold water in a small bowl and let it bloom for 5 minutes. Microwave in 10-second intervals until completely dissolved. Whip the cold heavy cream until stiff peaks form. To temper the gelatin, mix 2 tablespoons of whipped cream into the dissolved gelatin, then slowly pour this mixture back into the whipped cream while beating continuously this prevents lumps.
Step 7: Incorporate Melted Chocolate
Add the melted (slightly cooled) chocolate to the mousse in two additions, folding gently but thoroughly after each addition until the mixture is smooth, uniform, and silky. The mousse should hold its shape while remaining light and airy.
Step 8: Layer the Cake
Using a serrated knife, carefully divide the cooled cake into three even horizontal layers. Line the sides of your springform pan with acetate sheets or a parchment paper strip (this creates clean edges). Place the first cake layer in the pan and brush generously with simple syrup.
Step 9: First Mousse Layer
Spread half of the chocolate mousse evenly over the first cake layer using an offset spatula. Refrigerate for 35 minutes to allow the mousse to set slightly. This prevents the layers from sliding when you add the next one.
Step 10: Second Layer and Final Assembly
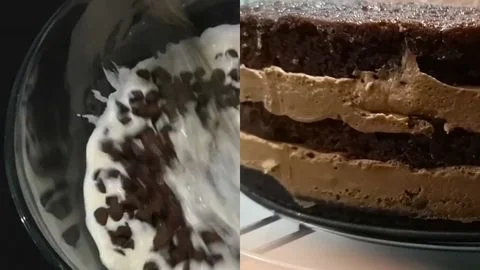
Add the second cake layer, brush with syrup, then spread the remaining mousse evenly. Refrigerate for another 35 minutes. Place the final cake layer on top, brush with syrup, cover with plastic wrap, and refrigerate overnight (or at least 2 hours minimum) for the mousse to fully set.
Step 11: Prepare the Chocolate Ganache
Add chopped chocolate to a bowl with warm heavy cream. Let it sit for 1 minute, then whisk until the chocolate is completely melted and the ganache is glossy and smooth. Reserve about ¼ cup of ganache in a separate container for drizzling. Whip the remaining ganache with a mixer until it becomes light, fluffy, and spreadable.
Step 12: Frost and Decorate
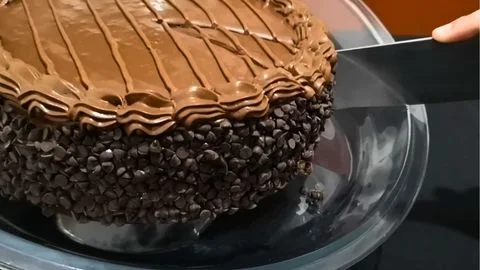
Remove the springform ring and acetate sheets from your chilled cake. Using an offset spatula, cover the entire cake top and sides with the whipped ganache, creating a smooth finish. Gently press chocolate chips around the sides of the cake, covering them completely for that signature Hooters chocolate mousse cake appearance.
Step 13: Final Touches
Fill a piping bag fitted with a star tip (Wilton 1M) with additional whipped ganache and pipe decorative rosettes around the top border of the cake. Gently warm the reserved ganache until it’s pourable, then drizzle it over the top in decorative lines. Refrigerate for 30 minutes before slicing to allow the decorations to set.
Customization and Pairing for Serving Ideas
1. White Chocolate Variation
Transform this chocolate mousse cake recipe into an elegant white chocolate version by substituting white chocolate for dark chocolate in both the mousse and ganache. Use white chocolate chips for the sides and add a dusting of edible gold leaf for special occasions. This variation pairs beautifully with raspberry coulis or fresh strawberries.
2. Espresso-Enhanced Mousse
Elevate the chocolate flavor by adding 2 tablespoons of instant espresso powder to the mousse mixture. The coffee doesn’t make it taste like coffee it intensifies the chocolate notes and adds sophisticated depth. This best chocolate mousse cake recipe variation is perfect for adult gatherings and pairs wonderfully with Irish cream liqueur or dessert wine.
3. Nutty Crunch Addition
Add texture by folding ½ cup of finely chopped toasted hazelnuts or almonds into the mousse before assembling. You can also coat the sides with crushed nuts instead of chocolate chips for a Ferrero Rocher-inspired presentation. Serve with hazelnut gelato or vanilla bean ice cream for a restaurant-quality dessert.
4. Berry Compote Pairing
Balance the rich chocolate with a tangy mixed berry compote served alongside each slice. Simmer fresh or frozen raspberries, blueberries, and blackberries with sugar and lemon juice until thickened. The fruit’s acidity cuts through the richness beautifully, making this Hooters copycat dessert feel lighter and more refreshing.
5. Salted Caramel Drizzle
Instead of chocolate drizzle on top, use salted caramel sauce for a sweet-salty contrast that’s absolutely addictive. You can also add a thin layer of caramel between the cake layers for extra decadence. Pair with vanilla whipped cream and sea salt flakes for a gourmet finish.
6. Individual Mini Cakes
Adapt this recipe for Hooters chocolate mousse cake into individual portions using 4-inch cake rings or ramekins. This presentation is perfect for dinner parties or Hooters birthday cake celebrations where elegant plating matters. Garnish each mini cake with fresh mint leaves and a chocolate curl.
7. Boozy Adult Version
Enhance the simple syrup with 2 tablespoons of dark rum, Kahlúa, or Grand Marnier for an adults-only treat. The alcohol complements the chocolate while keeping the cake moist. Serve with coffee or port wine for an impressive finale to any dinner party. This sophisticated twist on the Hooters dessert menu favorite will have guests raving.
Essential Tips for Perfect Results
1. Room Temperature Eggs Are Non-Negotiable
For this chocolate mousse cake recipe easy technique to work, your eggs must be at room temperature before beating. Cold eggs don’t incorporate as much air, resulting in a denser, less fluffy sponge cake. Set your eggs out 30-60 minutes before baking, or quick-temper them by placing in warm (not hot) water for 5 minutes. The difference in volume is dramatic room temperature eggs can triple in volume when beaten properly.
2. Don’t Skip the Cocoa-Dusted Pan
Using cocoa powder instead of flour to dust your greased pan is crucial for maintaining the deep chocolate color of your cake. Flour creates white streaks on the cake’s exterior, which looks unprofessional once assembled. This small detail is what separates homemade cakes from bakery-quality Hooters copycat desserts. Make sure to tap out excess cocoa powder just as you would with flour.
3. Master the Gelatin Tempering Technique
The most common mistake when making chocolate mousse is adding hot gelatin directly to cold whipped cream, which creates lumps and deflates your mousse. Always temper by mixing gelatin with a small amount of cream first, then gradually incorporating it while beating continuously. This ensures smooth, stable mousse that holds its shape for days without weeping or separating.
4. Patience with Chilling Times
Resist the urge to rush the refrigeration periods between layers. If you add the next layer before the previous mousse has set sufficiently, you’ll end up with sliding layers and a lopsided cake. The overnight chill before frosting is especially important it allows the mousse to firm up completely, making the cake much easier to handle and frost smoothly. This patience transforms a good cake into the best chocolate mousse cake recipe ever.
5. Use Quality Chocolate
Since chocolate is the star ingredient in this Hooters chocolate mousse cake recipe, quality matters immensely. Choose chocolate with at least 60% cocoa content for the mousse and ganache avoid chocolate chips for melting as they contain stabilizers that affect texture. Brands like Ghirardelli, Callebaut, or Lindt deliver superior flavor and smooth melting properties. The investment in good chocolate is what makes this taste authentically like the restaurant version.
6. The Acetate Sheet Secret
Professional bakers swear by acetate sheets (clear plastic strips) for creating perfectly smooth sides on layered cakes. They’re reusable, create sharper edges than parchment paper, and the mousse doesn’t stick to them. Line your springform pan with acetate before assembling, and when you remove it, you’ll reveal pristine, professional-looking sides ready for chocolate chip decoration. You can find acetate sheets inexpensively online or at cake decorating supply stores.
7. Ganache Consistency Is Everything
The ganache for this chocolate mousse cake Hooters recipe serves double duty some gets whipped for frosting, some stays liquid for drizzling. When making ganache, the chocolate-to-cream ratio should be 1:1 for a spreadable consistency. Let it cool to room temperature before whipping if it’s too warm, it won’t hold air; if too cold, it’ll seize into chunks. Test by touching the bowl it should feel neutral, not warm or cold. Properly whipped ganache should be fluffy, spreadable, and hold peaks like buttercream.

Storage and Reheating Guidance
Store your copycat Hooters chocolate mousse cake recipe creation in the refrigerator, covered loosely with plastic wrap or in an airtight cake carrier, for up to 4 days. The mousse-based filling requires cold storage and should never be left at room temperature for more than 2 hours. For best texture and flavor, remove individual slices from the refrigerator 10-15 minutes before serving to take the chill off this allows the chocolate flavors to fully bloom on your palate. This cake is not suitable for freezing due to the mousse filling, which can separate upon thawing.
Common Queries and FAQs
Everything you need to know about Hooters Chocolate Mousse Cake Recipe: common questions answered.
Can I make this chocolate mousse cake without kefir?
Absolutely! While naturally fermented milk kefir adds a subtle tang and tender crumb to this Hooters chocolate mousse cake recipe, it’s easily substitutable. Plain full-fat yogurt, buttermilk, or even sour milk (add 1 tablespoon lemon juice to ¾ cup regular milk and let sit 5 minutes) work beautifully. The acidity in these substitutes reacts with the baking powder to create a light, fluffy texture while keeping the cake moist. Greek yogurt can also work but thin it slightly with milk to achieve a pourable consistency similar to kefir.
Why did my chocolate mousse turn grainy or lumpy?
Grainy mousse typically results from adding hot melted chocolate directly to cold whipped cream, causing the chocolate to seize. Always let your melted chocolate cool to room temperature before incorporating it into the mousse. Add it gradually in two batches, folding gently but thoroughly. Lumpy mousse usually indicates the gelatin wasn’t properly dissolved or was added while too hot. Always bloom gelatin in cold water, fully dissolve it in the microwave, then temper it by mixing with a small amount of cream before adding to the main mixture while beating continuously.
How do I prevent my cake layers from sliding?
Layer sliding is the most common assembly issue with this chocolate mousse cake recipe easy approach. The solution lies in proper chilling between layers refrigerate for the full 35 minutes after each mousse addition to allow it to partially set. Using a springform pan with acetate sheets or parchment lining helps contain everything. Make sure your cake layers are completely flat (trim any doming with a serrated knife), and don’t over-soak with syrup, which can make layers slippery. The overnight final chill is crucial for structural integrity.
Can I make this cake ahead of time for a party?
This Hooters birthday cake copycat is actually ideal for advance preparation! You can bake the cake layers 1-2 days ahead, wrap them tightly in plastic wrap, and store at room temperature. The assembled cake (through step 10 before ganache) can be made up to 2 days in advance and kept refrigerated. Apply the ganache coating and decorations the day before serving. The flavors actually improve after 24 hours as they meld together. Avoid making it more than 3 days ahead, as the cake may become soggy and the mousse can start to weep.
What’s the best way to get clean slices when cutting?
Professional-looking slices require the right technique with this best chocolate mousse cake recipe. Use a long, sharp knife and run it under hot water, then wipe completely dry before each cut. Make one smooth downward motion rather than sawing back and forth. Clean the knife with a damp towel between every slice to prevent mousse from smearing. Cut while the cake is well-chilled but let slices sit 10 minutes before plating. For the cleanest cuts, use a thin-bladed knife rather than a thick chef’s knife, as it pushes through the layers more easily.
Can I use milk chocolate instead of dark chocolate?
While you can substitute milk chocolate in this recipe for Hooters chocolate mousse cake, be aware that it will significantly change the flavor profile and sweetness level. Milk chocolate is sweeter and less intense than dark chocolate, so your mousse and ganache will be milder and more dessert-like rather than sophisticated. If using milk chocolate, reduce the sugar in the cake slightly and consider using semi-sweet chocolate chips for the sides to add some contrast. Dark chocolate (60-70% cocoa) provides the depth and richness that makes this recipe taste like the restaurant version.
My ganache won’t whip what went wrong?
Ganache that won’t whip is usually a temperature or ratio issue. For whippable ganache in this Hooters dessert recipe, you need a 1:1 chocolate-to-cream ratio and the ganache must be completely cooled to room temperature (around 65-70°F). If it’s too warm, it won’t hold air; if it’s too cold and firm, it will separate into chunks when beaten. Test by touching the bowl it should feel neutral. If your ganache is too cold, let it sit at room temperature for 15-20 minutes and try again. If too warm, refrigerate for 10 minutes, stirring occasionally, then whip.
What causes the sponge cake to deflate after baking?
A deflated sponge cake is heartbreaking, but the cause is usually over-mixing after adding flour or removing the cake from the oven too quickly. When you add flour and cocoa powder to the beaten eggs, fold gently using a spatula rather than beating with the mixer this preserves the air bubbles. Also, avoid opening the oven door during the first 30 minutes of baking, as temperature fluctuations cause collapse. Let the cake cool gradually in the pan for 10 minutes before removing to prevent sudden temperature shock. Proper folding technique is essential for this chocolate mousse cake Hooters recipe to achieve that light, airy texture.
How do I know when the mousse has set enough between layers?
The mousse should be firm to the touch but not completely solid after the 35-minute refrigeration periods. Press gently with your fingertip it should spring back slightly without leaving a deep indentation. If it’s still very jiggly or liquid, give it another 15 minutes. The goal is for it to be stable enough to support the next cake layer without squishing out the sides. For the final overnight chill, the mousse should be completely firm throughout this ensures the cake holds together perfectly when you remove the springform ring and begin frosting.
Can I make a smaller or larger version of this cake?
This copycat Hooters chocolate mousse cake recipe is easily scalable! For a 6-inch cake (serves 6-8), reduce all ingredients by half and bake for 30-35 minutes. For a larger 10-inch cake (serves 16-20), increase ingredients by 1.5 times and bake for 50-55 minutes. You can also make this as a sheet cake or in two 8-inch round pans (bake 25-30 minutes). Adjust mousse quantities proportionally you’ll need enough to create ½-inch thick layers between cake layers. The assembly process and chilling times remain the same regardless of size.
Why are my chocolate chips falling off the sides?
Chocolate chips slide off when the ganache coating is too cold and hard or too warm and soft. Apply chips when the ganache is freshly spread and still slightly tacky this is the perfect “glue” consistency. Press each chip gently but firmly into the ganache, working from bottom to top in overlapping rows. If your ganache has already set firm, warm it slightly with your hands or a hair dryer on low heat to create a slightly tacky surface. Some bakers also spread a thin layer of extra ganache on the sides right before applying chips for extra adhesion in this Hooters dessert menu favorite recreation.
Is there a dairy-free or vegan version possible?
Creating a vegan version of this best chocolate mousse cake recipe ever is challenging but possible with careful substitutions. Use flax eggs (1 tablespoon ground flaxseed + 3 tablespoons water per egg) for the cake, dairy-free milk with vinegar for the kefir, and coconut oil for vegetable oil. For the mousse, use full-fat coconut cream (chilled overnight and whipped) with agar-agar instead of gelatin. The ganache works with coconut cream and dairy-free chocolate. Note that texture and stability will differ from the original the mousse will be less stable and the cake slightly denser. Vegan versions require extra chilling time and careful handling.
Hooters Chocolate Mousse Cake Recipe

If you’ve ever celebrated a birthday at Hooters or scrolled through their dessert menu with serious cake envy, you know their chocolate mousse cake is legendary. This copycat Hooters chocolate mousse cake recipe brings that restaurant-quality indulgence straight to your kitchen. With layers of fluffy chocolate sponge, silky chocolate mousse filling, and a rich ganache coating studded with chocolate chips, this showstopping dessert rivals any bakery creation.
Ingredients
- 3-4 large eggs (at room temperature)
- 1 teaspoon vanilla extract
- ¾ cup granulated sugar
- ½ cup vegetable oil (or neutral oil)
- 2 teaspoons baking powder
- Pinch of salt
- 1½ cups all-purpose flour (divided)
- ⅓ cup cocoa powder
- ¾ cup naturally fermented milk kefir (or substitute with plain yogurt or buttermilk)
- Extra cocoa powder for dusting the pan
- ½ cup water
- ¼ cup sugar
- 2 cups heavy whipping cream (cold)
- 2 teaspoons unflavored gelatin
- 3 tablespoons cold water
- 6 ounces dark or semi-sweet chocolate (melted and slightly cooled)
- 8 ounces chocolate (chopped)
- 1 cup heavy cream (warm)
- 1-1½ cups chocolate chips (for coating the sides)
Instructions
Step 1: Prepare the Chocolate Sponge Cake
Preheat your oven to 180°C (350°F). Grease a 9-inch springform pan and dust it with cocoa powder instead of flour this keeps the cake beautifully dark. In a large mixing bowl, add eggs and vanilla extract, then beat with a hand mixer on high speed for 3-4 minutes until the mixture doubles in volume, becoming light, fluffy, and pale yellow.
Step 2: Build the Cake Batter
While continuing to beat, gradually add the sugar in a steady stream until fully incorporated. Slowly drizzle in the oil in a thin stream, allowing it to emulsify into the batter. Add the baking powder, a pinch of salt, and half of the flour (¾ cup), then gently fold using a rubber spatula to avoid deflating the batter.
Step 3: Add Cocoa and Fermented Milk
Sift in the cocoa powder along with the remaining flour, folding carefully to maintain airiness. If using kefir grains, strain them to extract the liquid fermented milk (reserve grains for future batches). Pour the kefir liquid into the batter and mix until just combined the batter should be smooth and pourable.
Step 4: Bake the Cake
Pour the batter into your prepared pan and bake for 40-45 minutes, or until a toothpick inserted in the center comes out clean. The cake should spring back when lightly touched. Allow the cake to cool completely in the pan before removing this prevents cracking and ensures easier layering.
Step 5: Prepare the Simple Syrup
While the cake cools, combine water and sugar in a small saucepan. Heat until the sugar dissolves completely, then let it cool. This syrup keeps the cake layers moist and adds subtle sweetness.
Step 6: Make the Chocolate Mousse Filling
Chill your mixing bowl and whisk attachment in the freezer for 10 minutes. Sprinkle gelatin over cold water in a small bowl and let it bloom for 5 minutes. Microwave in 10-second intervals until completely dissolved. Whip the cold heavy cream until stiff peaks form. To temper the gelatin, mix 2 tablespoons of whipped cream into the dissolved gelatin, then slowly pour this mixture back into the whipped cream while beating continuously this prevents lumps.
Step 7: Incorporate Melted Chocolate
Add the melted (slightly cooled) chocolate to the mousse in two additions, folding gently but thoroughly after each addition until the mixture is smooth, uniform, and silky. The mousse should hold its shape while remaining light and airy.
Step 8: Layer the Cake
Using a serrated knife, carefully divide the cooled cake into three even horizontal layers. Line the sides of your springform pan with acetate sheets or a parchment paper strip (this creates clean edges). Place the first cake layer in the pan and brush generously with simple syrup.
Step 9: First Mousse Layer
Spread half of the chocolate mousse evenly over the first cake layer using an offset spatula. Refrigerate for 35 minutes to allow the mousse to set slightly. This prevents the layers from sliding when you add the next one.
Step 10: Second Layer and Final Assembly
Add the second cake layer, brush with syrup, then spread the remaining mousse evenly. Refrigerate for another 35 minutes. Place the final cake layer on top, brush with syrup, cover with plastic wrap, and refrigerate overnight (or at least 2 hours minimum) for the mousse to fully set.
Step 11: Prepare the Chocolate Ganache
Add chopped chocolate to a bowl with warm heavy cream. Let it sit for 1 minute, then whisk until the chocolate is completely melted and the ganache is glossy and smooth. Reserve about ¼ cup of ganache in a separate container for drizzling. Whip the remaining ganache with a mixer until it becomes light, fluffy, and spreadable.
Step 12: Frost and Decorate
Remove the springform ring and acetate sheets from your chilled cake. Using an offset spatula, cover the entire cake top and sides with the whipped ganache, creating a smooth finish. Gently press chocolate chips around the sides of the cake, covering them completely for that signature Hooters chocolate mousse cake appearance.
Step 13: Final Touches
Fill a piping bag fitted with a star tip (Wilton 1M) with additional whipped ganache and pipe decorative rosettes around the top border of the cake. Gently warm the reserved ganache until it’s pourable, then drizzle it over the top in decorative lines. Refrigerate for 30 minutes before slicing to allow the decorations to set.
Notes
Store your copycat Hooters chocolate mousse cake recipe creation in the refrigerator, covered loosely with plastic wrap or in an airtight cake carrier, for up to 4 days. The mousse-based filling requires cold storage and should never be left at room temperature for more than 2 hours. For best texture and flavor, remove individual slices from the refrigerator 10-15 minutes before serving to take the chill off this allows the chocolate flavors to fully bloom on your palate. This cake is not suitable for freezing due to the mousse filling, which can separate upon thawing.
Nutrition Information:
Yield:
8Serving Size:
1Amount Per Serving: Calories: 110
This copycat Hooters chocolate mousse cake recipe proves that restaurant-quality desserts are absolutely achievable in your home kitchen. With layers of tender chocolate sponge, luxurious mousse filling, and elegant ganache coating, you’ve created a showstopper that rivals any bakery creation.
Whether you’re celebrating a special Hooters birthday cake memory or simply indulging your chocolate cravings, this best chocolate mousse cake recipe delivers impressive results that taste as incredible as they look.
The combination of make-ahead convenience and spectacular presentation makes it perfect for any celebration. Now slice yourself a generous piece, savor every decadent bite, and bask in the compliments you’ve earned them, baker!
I’d love to hear your thoughts-leave a comment on the blog and let me know How it came out! Don’t forget to follow me on Pinterest, Facebook and YouTube for more delicious updates. Your support truly means everything to me.