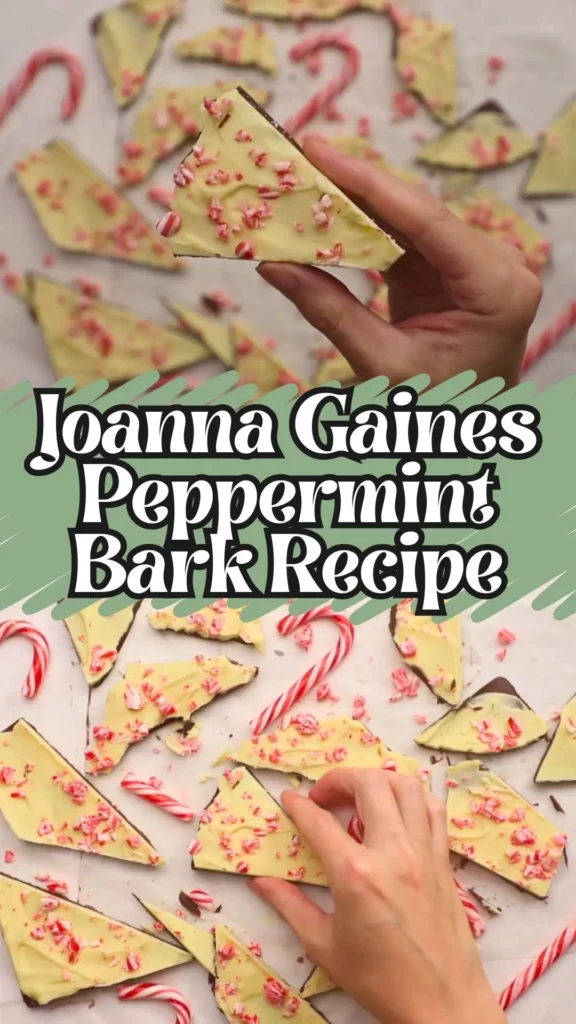
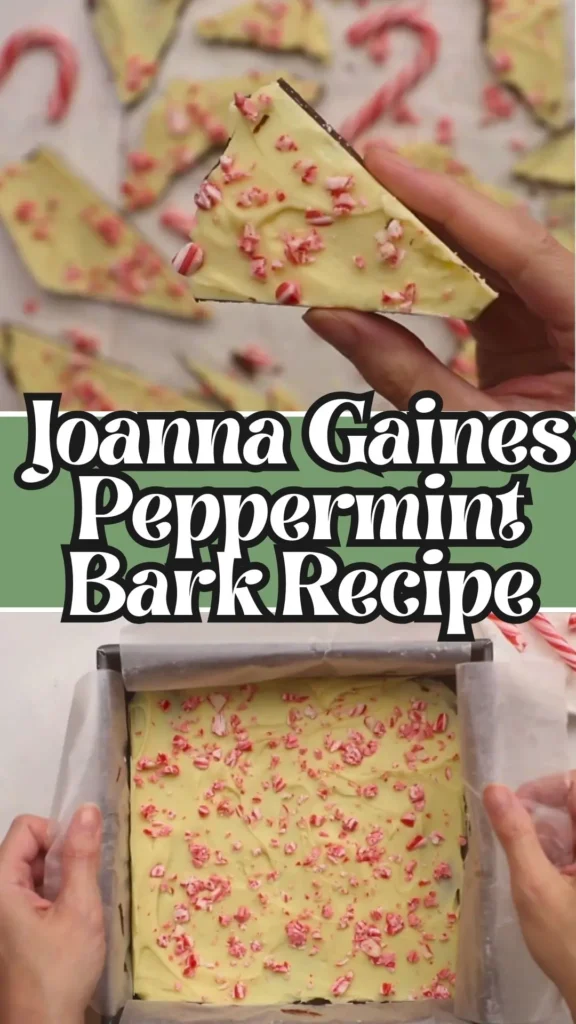
There’s something magical about recreating Joanna Gaines’ beloved peppermint bark in your own kitchen. This white chocolate candy cane bark has become a holiday staple for good reason it combines rich layers of semi-sweet and white chocolate with the refreshing crunch of candy canes.
Whether you’re searching for impressive homemade gifts or simply want to indulge in one of Joanna Gaines’ desserts, this glossier peppermint bark delivers that perfect balance of sweetness and minty freshness.
The best part? You only need four simple ingredients and about 90 minutes from start to finish to create this festive confection that rivals any artisan candy shop.
What Does It Taste Like?
This white chocolate peppermint bark offers a luxurious sensory experience that delights with every bite. The first layer provides deep, velvety semi-sweet chocolate richness that melts smoothly on your tongue, followed by the creamy, buttery sweetness of white chocolate infused with cool peppermint extract.
The crushed candy canes add delightful textural contrast crispy, crunchy bursts that release waves of refreshing mint flavor.
Together, these elements create a perfectly balanced treat that’s neither too sweet nor too minty, with that signature glossy finish that makes Joanna Gaines candy recipes so irresistible.
Joanna Gaines Peppermint Bark Recipe Ingredients You’ll Need
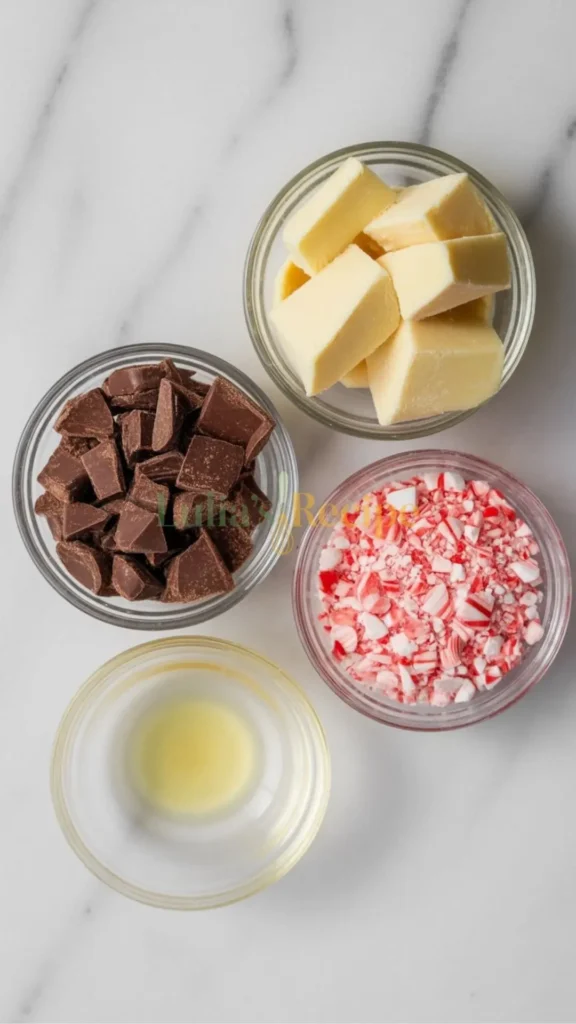
Main Ingredients:
- 12 oz semi-sweet chocolate (preferably bar chocolate, finely chopped)
- 16 oz white chocolate (bar chocolate, finely chopped)
- 7 regular candy canes, crushed
- ½ tsp peppermint extract
Kitchen Utensils:
- 8×8 or 9×9 inch baking pan
- Parchment paper
- Double boiler or microwave-safe bowls
- Sharp knife and cutting board
- Rubber spatula
- Zip-lock bag and rolling pin (for crushing candy canes)
Preparation and Cooking Time
- Prep Time: 20 minutes
- Chilling Time: 70 minutes (10-20 minutes for first layer, 60+ minutes for final set)
- Total Time: 90 minutes
- Servings: Approximately 24-30 pieces (depending on size)
- Difficulty Level: Easy
Joanna Gaines Peppermint Bark Recipe Instructions
Step 1: Prepare Your Pan Line an 8×8 or 9×9 inch pan with parchment paper, ensuring the paper extends over the edges for easy removal later. This prevents sticking and makes cutting your peppermint bark much simpler.
Step 2: Crush the Candy Canes Place unwrapped candy canes in a zip-lock bag and gently crush them with a rolling pin. Aim for varied sizes some fine powder and some larger chunks for optimal texture in your white chocolate candy cane bark.
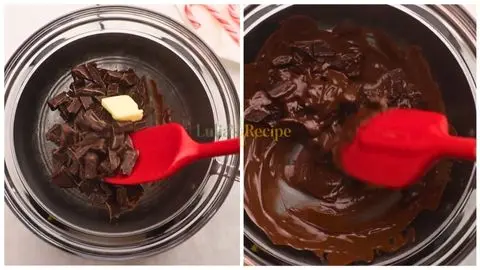
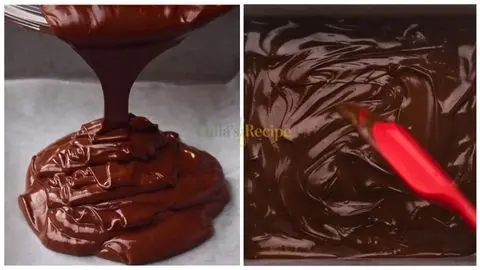
Step 3: Melt the Semi-Sweet Chocolate Finely chop 12 oz of semi-sweet chocolate into small, uniform pieces. Melt using a double boiler over simmering water, stirring constantly until smooth and glossy. Alternatively, microwave in 30-second intervals at 50% power, stirring between each round to prevent burning.
Step 4: Create the Dark Chocolate Base Pour the melted semi-sweet chocolate into your prepared pan, spreading it evenly with a rubber spatula to reach all corners. The layer should be smooth and uniform for the best presentation.
Step 5: Chill the First Layer Refrigerate the dark chocolate base for 10-20 minutes until it’s semi-set slightly firm to the touch but not completely hardened. This ensures the layers bond properly without mixing.
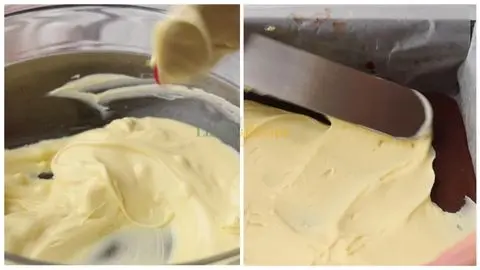
Step 6: Melt the White Chocolate While the base chills, finely chop 16 oz of white chocolate. Using a clean, completely dry double boiler or microwave, melt the white chocolate carefully, stirring frequently. White chocolate burns more easily than dark, so use gentle heat and patience.
Step 7: Add Peppermint and Candy Canes Once the white chocolate is smooth and fully melted, remove from heat and stir in ½ teaspoon of peppermint extract. Add ⅓ cup of the crushed candy canes, mixing until evenly distributed throughout the white chocolate.
Step 8: Layer the White Chocolate Check that your dark chocolate base is slightly firm. Gently pour the white chocolate peppermint mixture over the base, starting from the center and working outward. Use a spatula to spread evenly, being careful not to disturb or mix the bottom layer.
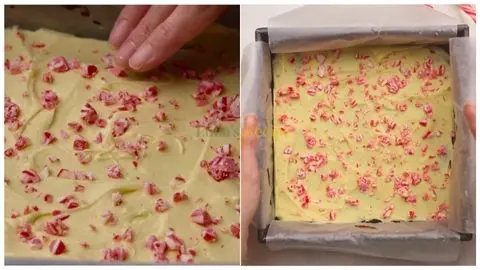
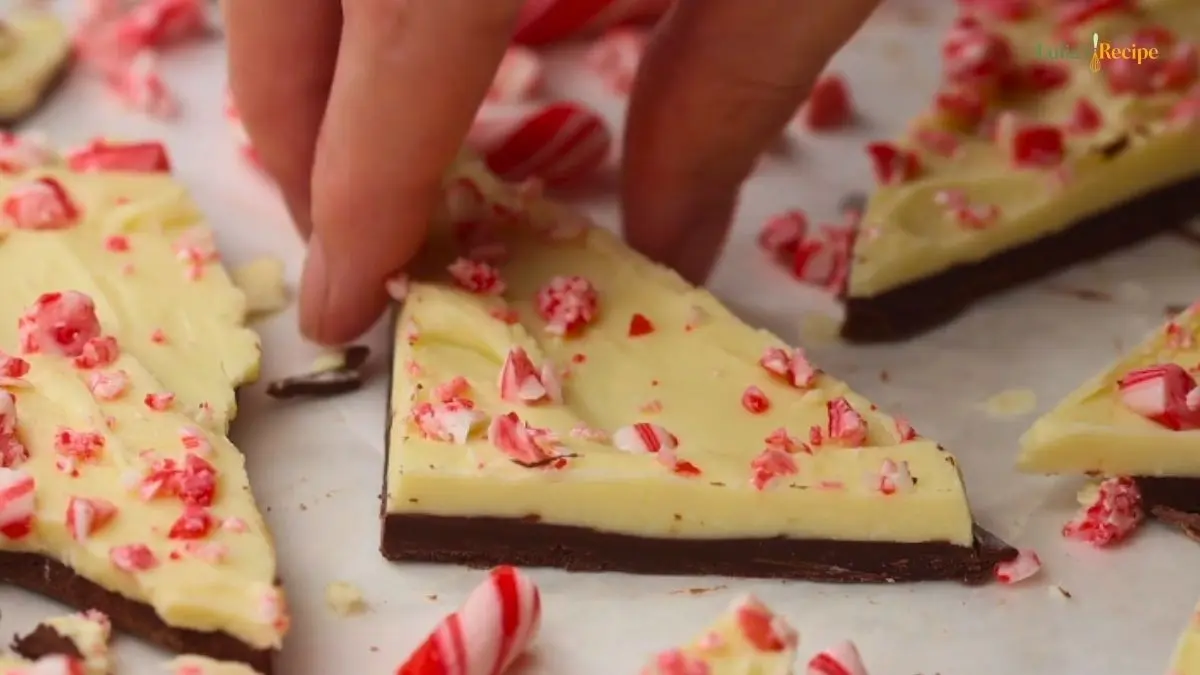
Step 9: Add the Festive Topping Immediately sprinkle the remaining crushed candy canes over the top of your Joanna Gaines peppermint bark while the white chocolate is still wet. Lightly press them with your hand or the back of a spoon so they adhere properly as the bark sets.
Step 10: Final Chill and Cut Refrigerate the bark for at least 1 hour, or until completely firm and set. Once solid, lift the bark from the pan using the parchment paper edges, peel away the paper, and use a sharp knife to cut into squares, rectangles, or irregular rustic pieces.
Customization and Pairing Ideas for Serving
1. Dark Chocolate Lover’s Version
Swap the semi-sweet chocolate for dark chocolate (70% cacao or higher) to create a more sophisticated, less-sweet version of this white chocolate peppermint bark. The bitter notes of dark chocolate pair beautifully with the sweet white chocolate layer and create an elegant contrast that adult palates adore.
2. Milk Chocolate Twist
Replace the semi-sweet chocolate base with creamy milk chocolate for a sweeter, more kid-friendly version. This variation works wonderfully for children’s holiday parties and creates a milder flavor profile that appeals to those who prefer gentler chocolate notes.
3. Triple Chocolate Peppermint Bark
Add a middle layer of milk chocolate between the dark and white layers for an impressive three-tiered treat. This stunning variation showcases your chocolatier skills and creates visual drama that makes it perfect for gift-giving or dessert tables.
4. Holiday Spice Enhancement
Mix ¼ teaspoon of vanilla extract or a pinch of sea salt into your white chocolate layer along with the peppermint extract. These subtle additions enhance the overall flavor complexity and give your Joanna Gaines candy recipes a gourmet twist.
5. Beverage Pairings
Serve your glossier peppermint bark alongside hot cocoa, peppermint mochas, or Irish coffee for an indulgent holiday experience. The bark also pairs beautifully with chai tea or vanilla-flavored coffee, as the spices complement the mint and chocolate flavors.
6. Dessert Board Centerpiece
Feature your white chocolate candy cane bark as the star of a holiday dessert charcuterie board. Surround it with chocolate truffles, shortbread cookies, fresh berries, and nuts for a stunning presentation that guests can graze on throughout your gathering.
7. Gift Packaging Ideas
Break your peppermint bark into irregular pieces and package in clear cellophane bags tied with festive ribbon, or layer pieces in mason jars with tissue paper. These make thoughtful homemade gifts for teachers, neighbors, coworkers, and friends during the holiday season.

Essential Tips for Perfect Peppermint Bark
1. Choose Quality Bar Chocolate
Always use bar chocolate rather than chocolate chips for this recipe. Chocolate chips contain stabilizers that prevent proper melting and can result in a grainy, less glossy texture. High-quality bar chocolate melts smoothly and creates that signature shiny finish that makes Joanna Gaines desserts so visually appealing.
2. Master the Tempering Timing
The key to perfect layers is timing the white chocolate pour correctly. Your dark chocolate base should be firm enough to hold the weight of the white chocolate but still slightly tacky so the layers bond together. If the base is too hard, the layers may separate when you cut the bark.
3. Prevent White Chocolate Seizing
White chocolate is extremely sensitive to moisture and heat. Ensure all your utensils are completely dry before melting, and never let water or steam come into contact with the chocolate. If using a microwave, use 50% power and stir every 20-30 seconds to prevent scorching.
4. Control Your Candy Cane Crush
Create texture variety by crushing candy canes into different sizes some fine powder, some small chunks, and some larger pieces. The powder incorporates seamlessly into the white chocolate, while larger pieces provide satisfying crunch. Place candy canes in a heavy-duty zip-lock bag to prevent sharp candy shards from puncturing it.
5. Line Your Pan Properly
Use parchment paper that extends over the pan edges by at least 2 inches on two opposite sides. This creates “handles” that allow you to lift the entire bark out cleanly for cutting. Never skip this step, as trying to cut bark while still in the pan can crack or shatter your creation.
6. Achieve Clean Cuts
For professional-looking pieces, warm your knife under hot water, dry it completely, then make your cuts. Repeat this process between each cut. Alternatively, let the bark sit at room temperature for 5-10 minutes before cutting, which makes it less brittle and easier to slice cleanly.
7. Adjust Extract Intensity
Peppermint extract varies in strength between brands. Start with ½ teaspoon and taste the white chocolate mixture before pouring it over the base. You can always add a few more drops if you want a stronger mint flavor, but you can’t remove it once added. Some prefer a subtle hint of mint, while others love a powerful peppermint punch.
Storage and Reheating Guidance
Store your white chocolate peppermint bark in an airtight container with parchment paper between layers to prevent sticking. Keep refrigerated for up to 2 weeks or at cool room temperature (below 70°F) for 5-7 days. No reheating needed this confection is meant to be enjoyed cold or at room temperature.
Common Queries and FAQs
Here, we’ve got you covered with some common questions about this recipe that people often ask.
Can I use chocolate chips instead of bar chocolate for this Joanna Gaines peppermint bark?
While you can use chocolate chips in a pinch, bar chocolate is strongly recommended for superior results. Chocolate chips contain stabilizers that help them maintain their shape during baking, which means they don’t melt as smoothly and create a less glossy, sometimes grainy texture in candy applications like peppermint bark.
Why did my white chocolate seize and become grainy?
White chocolate seizes when it comes into contact with even tiny amounts of water or steam, or when it’s heated too quickly. To prevent this, ensure all utensils are completely dry, avoid getting water in your chocolate, and melt slowly using gentle heat. If using a double boiler, don’t let the water touch the bottom of the bowl.
How do I prevent the chocolate layers from separating when I cut the bark?
The timing of layering is crucial. Pour the white chocolate mixture when the dark chocolate base is semi-set (slightly firm but still tacky to the touch), not fully hardened. This allows the layers to bond together. Also, let the completed bark come to room temperature briefly before cutting to reduce brittleness.
Can I make this peppermint bark ahead of time for holiday gifting?
Absolutely! This white chocolate candy cane bark is perfect for advance preparation. Make it up to 2 weeks ahead and store in an airtight container in the refrigerator with parchment paper between layers. The flavors actually develop and meld beautifully over a few days, making it taste even better.
What’s the best way to crush candy canes without making a mess?
Place unwrapped candy canes in a heavy-duty freezer bag, seal it, then place that bag inside another bag for extra protection. Use a rolling pin, meat mallet, or the bottom of a heavy pan to crush them on a sturdy surface. Work gently to avoid puncturing the bag and creating a sticky mess.
Why is my peppermint bark not glossy like Joanna Gaines candy recipes?
A dull finish typically results from overheating the chocolate or using chocolate chips instead of bar chocolate. Chocolate that’s heated too high loses its temper and won’t have that signature shine. Melt chocolate slowly and gently, and consider using high-quality bar chocolate for the glossiest results.
Can I use mint extract instead of peppermint extract?
While you can substitute mint extract, peppermint extract is preferred for authentic flavor. Mint extract often has a more general “minty” taste, while peppermint extract provides that specific cool, crisp candy-cane flavor that defines this dessert. If using mint extract, you may need slightly less as it can be stronger.
How thin or thick should I spread the chocolate layers?
Aim for each chocolate layer to be about ¼ inch thick. The dark chocolate base should be slightly thinner than the white chocolate top layer. Too thin and the bark becomes fragile and breaks easily; too thick and it’s difficult to bite through and loses its delicate texture.
What if I don’t have peppermint extract?
You can make this glossier peppermint bark with crushed candy canes alone, though the peppermint flavor will be milder. The candy canes provide some minty flavor, especially the fine powder that incorporates into the white chocolate. For stronger flavor without extract, increase the candy cane amount to ½ cup mixed into the white chocolate.
Can I add other flavors or ingredients to customize this recipe?
Definitely! Popular additions include ¼ teaspoon vanilla extract, crushed Oreos, chopped nuts (almonds or pistachios work beautifully), dried cranberries for tartness, or a sprinkle of flaky sea salt on top. When adding mix-ins, keep the total amount to about ½ cup so you don’t overwhelm the chocolate layers.
Why did my dark chocolate turn white or gray after refrigerating?
This is called “chocolate bloom” and occurs when chocolate experiences temperature fluctuations or moisture exposure. While it doesn’t affect taste or safety, it impacts appearance. To prevent bloom, ensure chocolate is completely dry before melting, avoid rapid temperature changes, and store in airtight containers at consistent temperatures.
How do I get perfectly even layers in my white chocolate peppermint bark?
Pour the melted chocolate into the center of your pan, then use an offset spatula or the back of a spoon to spread it evenly to the edges. Gently tap the pan on the counter a few times to release air bubbles and help the chocolate self-level. Work quickly before the chocolate begins to set.
Is this recipe safe for people with peanut allergies?
This basic recipe contains no peanuts or tree nuts, making it safer for those with nut allergies. However, always check your chocolate labels, as some brands are processed in facilities that also handle nuts. If giving as gifts, always label potential allergens and cross-contamination risks clearly.
Joanna Gaines Peppermint Bark Recipe

There’s something magical about recreating Joanna Gaines’ beloved peppermint bark in your own kitchen. This white chocolate candy cane bark has become a holiday staple for good reason it combines rich layers of semi-sweet and white chocolate with the refreshing crunch of candy canes.
Notes
Store your white chocolate peppermint bark in an airtight container with parchment paper between layers to prevent sticking. Keep refrigerated for up to 2 weeks or at cool room temperature (below 70°F) for 5-7 days. No reheating needed this confection is meant to be enjoyed cold or at room temperature.
This Joanna Gaines peppermint bark recipe brings holiday magic right into your kitchen with minimal effort and maximum impact.
The combination of rich chocolate layers, refreshing peppermint, and festive candy cane crunch creates an irresistible treat that’s perfect for gift-giving, holiday parties, or simply treating yourself during the festive season.
With just four ingredients and simple techniques, you’ll create glossier peppermint bark that rivals anything from specialty candy shops. So gather your ingredients, embrace your inner chocolatier, and let this white chocolate candy cane bark become your new holiday tradition!
I’d love to hear your thoughts-leave a comment on the blog and let me know How it came out! Don’t forget to follow me on Pinterest, Facebook and YouTube for more delicious updates. Your support truly means everything to me.