If you’ve ever craved those iconic Hardees biscuits with their golden, flaky layers and buttery richness, you’re in the right place. This homemade Hardees biscuits recipe recreates the famous fast-food favorite right in your own kitchen.
With just a handful of simple ingredients-self-rising flour, cold butter, and tangy buttermilk-you can make copycat Hardees biscuits that rival the restaurant version.
Whether you’re planning to serve these with creamy sausage gravy for a classic Hardees biscuits and gravy breakfast or simply enjoy them warm with butter and honey, this recipe delivers tall, tender biscuits with that signature Southern-style texture. Learning how to make Hardees biscuits is easier than you think, and once you master this technique, you’ll never settle for store-bought again.
What Does a Hardees Biscuit Taste Like?
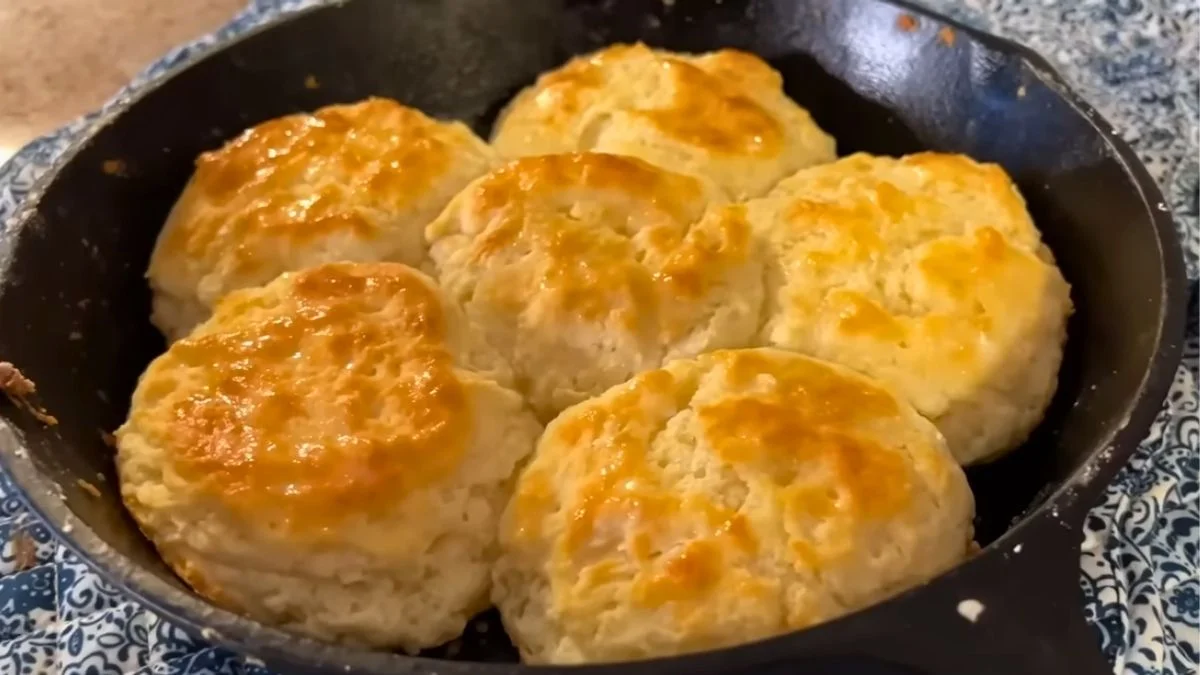
Hardees biscuits are legendary for their incredibly buttery, flaky texture with a tender, melt-in-your-mouth crumb. Each bite delivers rich, creamy flavor from the generous amount of butter folded into the dough, while the buttermilk adds a subtle tangy depth that balances the richness perfectly.

The exterior bakes up golden and slightly crisp, giving way to soft, pillowy layers inside. These homemade Hardees biscuits taste remarkably similar to the restaurant version-supremely buttery without being greasy, with just enough salt to enhance the natural flavors.
When served fresh from the oven, they’re light yet satisfying, with a comforting, homestyle quality that makes them perfect for breakfast sandwiches or alongside Hardees biscuits and gravy.
Ingredients and Kitchen Utensils
Ingredients
- Self-rising flour: 2 cups (White Lily preferred, plus extra for dusting)
- Unsalted butter: 1 stick, highly chilled/cold (plus extra for greasing and topping)
- Buttermilk: 1 1/3 cups (well-shaken)
- Baking powder: 1 teaspoon
- Salt: 1/4 teaspoon
Kitchen Utensils
- 10-inch cast-iron skillet
- Large mixing bowl
- Box grater
- Fork for mixing
- Biscuit cutter (2.5 to 3 inches)
- Measuring cups and spoons
- Pastry brush (optional, for buttering)
- Clean work surface for kneading
Preparation and Cooking Time
Prep Time: 10 minutes
Cook Time: 17 minutes
Total Time: 27 minutes
Servings: 8-10 biscuits
Recipe Instructions
Step 1: Prepare Your Oven and Pan
Preheat your oven to 425°F. Take a generous amount of butter and thoroughly grease your 10-inch cast-iron skillet, making sure to coat the bottom and sides. Set the prepared skillet aside while you mix your dough.
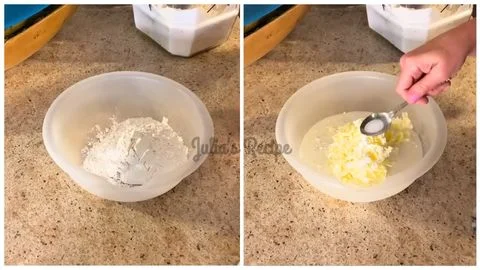
Step 2: Combine Dry Ingredients and Butter
Add the self-rising flour, baking powder, and salt to a large mixing bowl. Using a box grater, grate the entire stick of cold butter directly into the flour mixture. This technique keeps the butter cold and creates those signature flaky layers in your copycat Hardees biscuits.
Step 3: Add the Buttermilk
Pour the well-shaken buttermilk into the bowl with your flour and butter mixture. Using a fork, gently mix everything together until just combined. Be careful not to overmix or mash the butter-you want to see visible butter pieces throughout the dough, as this creates the flaky texture.
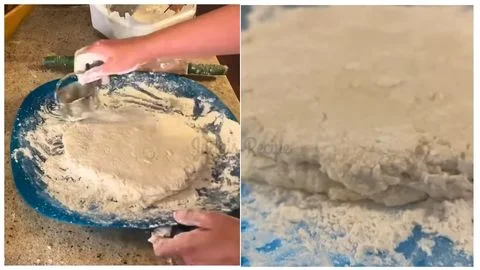
Step 4: Fold the Dough
Turn your sticky dough out onto a heavily floured work surface. With generously floured hands, gently fold the dough over itself and flatten it down 5 to 6 times. Add a sprinkle of flour if the dough is too sticky to handle. Pat the dough out to an even thickness of about 1 to 1.5 inches.
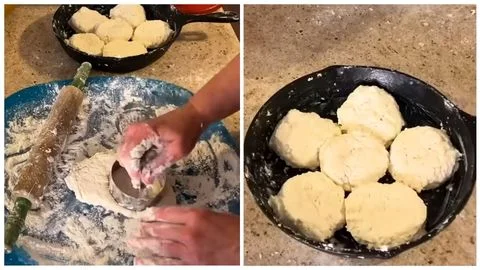
Step 5: Cut the Biscuits
Dip your biscuit cutter in flour, then press it straight down into the dough without twisting. Twisting the cutter seals the edges and prevents your Hardees biscuits from rising properly. Lightly toss each cut biscuit in your hands to shake off excess flour.
Step 6: Bake to Golden Perfection
Arrange the biscuits in your prepared cast-iron skillet so they’re touching each other-this helps them rise upward rather than spreading outward. Bake at 425°F for approximately 17 minutes, watching closely until the tops turn beautifully golden brown.
Step 7: Finish with Butter
The moment you remove your homemade Hardees biscuits from the oven, rub a stick of butter generously over the hot tops. This creates that signature glossy, buttery finish. Serve immediately while still warm!
Customization and Pairing Ideas for Serving
1. Classic Hardees Biscuits and Gravy
The most iconic way to serve these copycat Hardees biscuits is smothered in creamy sausage gravy. Make a simple country gravy by browning breakfast sausage, creating a roux with the drippings and flour, then whisking in milk until thick and peppery. Split your warm biscuits and ladle the gravy generously over the top for an authentic Southern breakfast experience.
2. Breakfast Sandwich Station
Transform your homemade Hardees biscuits into hearty breakfast sandwiches by filling them with fried eggs, crispy bacon or sausage patties, and a slice of American cheese. Add a drizzle of hot sauce or a smear of spicy mayo for extra flavor. This recreates the classic fast-food breakfast sandwich right at home.
3. Sweet Variations
For a sweeter take on this recipe for Hardees biscuits, serve them with butter and your favorite jam, honey, or sorghum syrup. You can also add a tablespoon of sugar to the dry ingredients before mixing and brush the tops with honey butter after baking for a dessert-style biscuit that pairs wonderfully with coffee or tea.
4. Savory Mix-Ins
Customize your Hardees biscuits ingredients by folding shredded cheddar cheese, crumbled bacon, fresh chives, or jalapeño slices into the dough before cutting. These savory additions create flavor-packed biscuits perfect for serving alongside soups, stews, or chili.
5. Biscuit Sliders
Use these biscuits as the base for mini sliders filled with pulled pork, fried chicken tenders, or country ham. The buttery, flaky texture complements savory fillings beautifully, making them perfect for brunch gatherings or game day spreads.
6. Strawberry Shortcake Base
Split your biscuits horizontally and layer them with fresh strawberries macerated in sugar and a generous dollop of whipped cream. The slight saltiness and buttery richness of these copycat Hardees biscuits provides the perfect contrast to sweet berries.

7. Pairing with Homemade Comfort Food
If you love homemade comfort food, be sure to try our Joanna Gaines Hush Puppy Recipe and Kellie Rasberry Mac and Cheese Recipe for more delicious bread-style favorites.
Essential Tips for Perfect Hardees Biscuits
1. Use White Lily Flour if Possible
While any self-rising flour works for this Hardees biscuits recipe, White Lily brand is the secret to achieving that authentic Southern texture. This flour has a lower protein content than other brands, which creates exceptionally tender, light biscuits that rise beautifully. If you can’t find White Lily, look for a soft wheat self-rising flour at your grocery store.
2. Keep Everything Cold
The secret to flaky, layered copycat Hardees biscuits is maintaining cold butter throughout the entire process. Freeze your butter for 15 minutes before grating, and even chill your buttermilk in the refrigerator until you’re ready to use it. Cold butter creates steam pockets during baking, which results in those coveted flaky layers.
3. Don’t Overmix the Dough
When learning how to make Hardees biscuits, one of the biggest mistakes is overmixing. Once you add the buttermilk, mix just until the ingredients come together. Overworking the dough develops gluten, which makes biscuits tough and dense instead of light and tender. You should still see visible butter pieces throughout the dough.
4. The Folding Technique Matters
Those 5 to 6 gentle folds aren’t just for show-they create the layered structure that makes Hardees biscuits so special. Each fold creates layers of butter and dough that separate during baking. Fold gently and don’t press down too hard, as you want to preserve those butter layers rather than smashing them flat.
5. Never Twist Your Biscuit Cutter
When cutting your homemade Hardees biscuits, press the cutter straight down and lift straight up without twisting. Twisting seals the edges and prevents the biscuits from rising to their full potential. Dip your cutter in flour between cuts to prevent sticking, and try to cut as many biscuits as possible from the first roll to ensure maximum height.
6. Let Biscuits Touch in the Pan
Arranging your biscuits so they’re touching in the cast-iron skillet isn’t just about fitting more in-it’s a crucial technique. When biscuits touch, they support each other and rise upward instead of spreading outward, creating those tall, impressive biscuits you see at Hardees. A cast-iron skillet also retains heat beautifully, creating a perfectly crisp bottom.

7. Serve Immediately for Best Results
These recipe Hardees biscuits are absolutely at their peak when served fresh from the oven. The texture changes as they cool, becoming denser and less tender. If you need to make them ahead, bake as directed, cool completely, and store in an airtight container. Reheat in a 350°F oven for 5-7 minutes to restore some of that just-baked texture.
Storage and Reheating Guidance
Store leftover Hardees biscuits in an airtight container at room temperature for up to 2 days. For longer storage, freeze individually wrapped biscuits for up to 3 months. Reheat refrigerated biscuits in a 350°F oven for 5-7 minutes until warmed through. Frozen biscuits can go directly into a 375°F oven for 12-15 minutes without thawing.
Common Queries and FAQs
Here, you’ll find answers to some common questions about the Hardees Biscuits Recipe that people frequently ask
Can I make these Hardees biscuits without self-rising flour?
Yes! Make your own self-rising flour by combining 2 cups all-purpose flour with 3 teaspoons baking powder and 1 teaspoon salt. Since this recipe already includes additional baking powder and salt, reduce those amounts slightly when using homemade self-rising flour to avoid over-leavening.
Why are my copycat Hardees biscuits flat and not fluffy?
Flat biscuits usually result from butter that wasn’t cold enough, overmixing the dough, or twisting the biscuit cutter. Make sure your butter is well-chilled, handle the dough minimally, and press your cutter straight down without twisting to allow maximum rise.
Can I use regular milk instead of buttermilk?
Buttermilk is essential for authentic Hardees biscuits ingredients because it provides both moisture and acidity that reacts with the leavening agents. If you don’t have buttermilk, make a substitute by adding 1 tablespoon of lemon juice or white vinegar to 1 1/3 cups of regular milk and letting it sit for 5 minutes.
How do I know when my homemade Hardees biscuits are done?
Your biscuits are ready when the tops are golden brown and they’ve risen significantly, usually around 17 minutes at 425°F. The internal temperature should reach about 200°F if you want to check with a thermometer, but visual cues work perfectly fine.
Can I make the dough ahead of time?
For best results, bake these biscuits immediately after cutting. However, you can cut the biscuits, place them on a parchment-lined baking sheet, freeze until solid, then transfer to a freezer bag. Bake frozen biscuits at 425°F for 20-22 minutes without thawing.
What makes this recipe similar to actual Hardees biscuits?
This copycat Hardees biscuits recipe uses the same key techniques: cold grated butter for flakiness, buttermilk for tenderness and tang, a high baking temperature for quick rise, and that signature butter brush on top while still hot. The ratios and method closely replicate the restaurant’s approach.
Do I have to use a cast-iron skillet?
While a cast-iron skillet gives the best results with excellent heat retention and a crispy bottom, you can use a regular baking sheet lined with parchment paper. Just note that your biscuits may spread slightly more and won’t have quite the same crispy bottom crust.
Why shake the buttermilk before using?
Buttermilk often separates as it sits, with thicker portions settling at the bottom. Shaking well ensures you’re using a consistent product throughout your dough, which helps achieve uniform texture in every biscuit.
Hardees Biscuits Recipe

If you’ve ever craved those iconic Hardees biscuits with their golden, flaky layers and buttery richness, you’re in the right place. This homemade Hardees biscuits recipe recreates the famous fast-food favorite right in your own kitchen.
Ingredients
- Self-rising flour: 2 cups (White Lily preferred, plus extra for dusting)
- Unsalted butter: 1 stick, highly chilled/cold (plus extra for greasing and topping)
- Buttermilk: 1 1/3 cups (well-shaken)
- Baking powder: 1 teaspoon
- Salt: 1/4 teaspoon
Instructions
Step 1: Prepare Your Oven and Pan
Preheat your oven to 425°F. Take a generous amount of butter and thoroughly grease your 10-inch cast-iron skillet, making sure to coat the bottom and sides. Set the prepared skillet aside while you mix your dough.
Step 2: Combine Dry Ingredients and Butter
Add the self-rising flour, baking powder, and salt to a large mixing bowl. Using a box grater, grate the entire stick of cold butter directly into the flour mixture. This technique keeps the butter cold and creates those signature flaky layers in your copycat Hardees biscuits.
Step 3: Add the Buttermilk
Pour the well-shaken buttermilk into the bowl with your flour and butter mixture. Using a fork, gently mix everything together until just combined. Be careful not to overmix or mash the butter-you want to see visible butter pieces throughout the dough, as this creates the flaky texture.
Step 4: Fold the Dough
Turn your sticky dough out onto a heavily floured work surface. With generously floured hands, gently fold the dough over itself and flatten it down 5 to 6 times. Add a sprinkle of flour if the dough is too sticky to handle. Pat the dough out to an even thickness of about 1 to 1.5 inches.
Step 5: Cut the Biscuits
Dip your biscuit cutter in flour, then press it straight down into the dough without twisting. Twisting the cutter seals the edges and prevents your Hardees biscuits from rising properly. Lightly toss each cut biscuit in your hands to shake off excess flour.
Step 6: Bake to Golden Perfection
Arrange the biscuits in your prepared cast-iron skillet so they’re touching each other-this helps them rise upward rather than spreading outward. Bake at 425°F for approximately 17 minutes, watching closely until the tops turn beautifully golden brown.
Step 7: Finish with Butter
The moment you remove your homemade Hardees biscuits from the oven, rub a stick of butter generously over the hot tops. This creates that signature glossy, buttery finish. Serve immediately while still warm!
Notes
Store leftover Hardees biscuits in an airtight container at room temperature for up to 2 days. For longer storage, freeze individually wrapped biscuits for up to 3 months. Reheat refrigerated biscuits in a 350°F oven for 5-7 minutes until warmed through. Frozen biscuits can go directly into a 375°F oven for 12-15 minutes without thawing.
Nutrition Information:
Yield:
10Serving Size:
1Amount Per Serving: Calories: 334
I’d love to hear your thoughts-leave a comment on the blog and let me know How it came out! Don’t forget to follow me on Pinterest, Facebook and YouTube for more delicious updates. Your support truly means everything to me.