
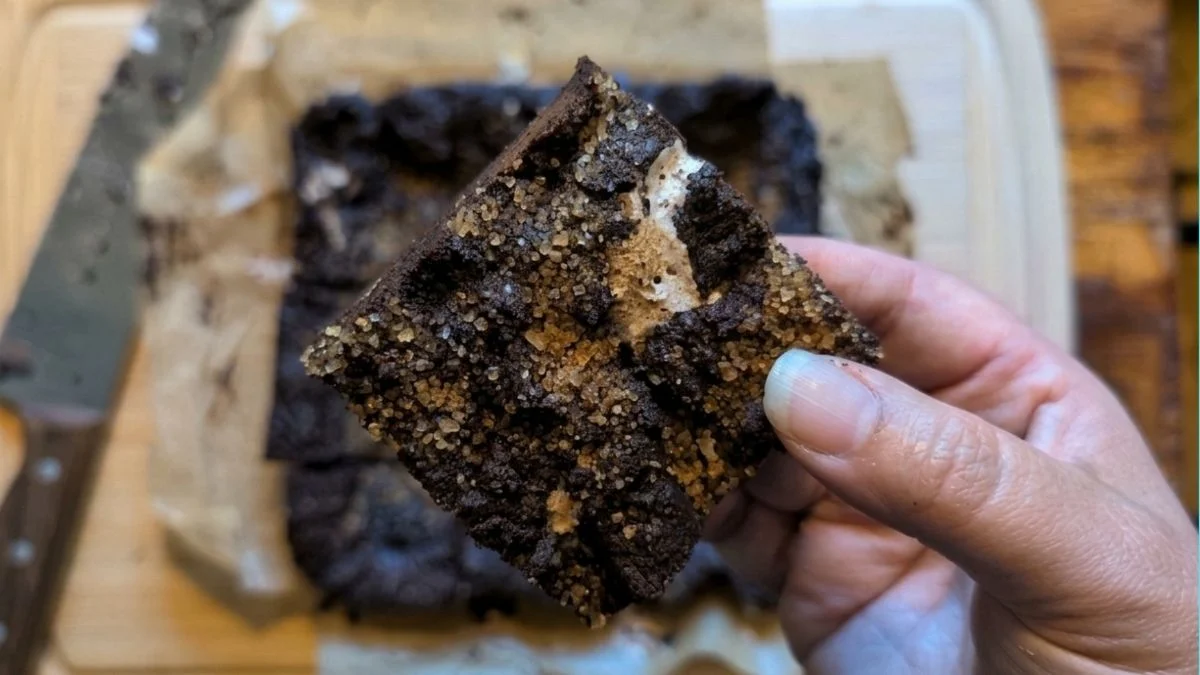
If you love bold flavors and crave something more exciting than an ordinary brownie, this Mexican hot chocolate brownies recipe is about to become your new obsession.
Inspired by the warming spices of traditional Mexican hot chocolate, these brownies layer rich cocoa, dark chocolate, cinnamon, cayenne pepper, and a hidden marshmallow center into one deeply satisfying treat.
Whether you are making abuelita Mexican hot chocolate brownies for a family celebration or whipping up Mexican hot chocolate brownies from mix on a weeknight, this recipe gives you everything you need. Fudgy, spiced, and finished with a sparkling cinnamon sugar crust, these brownies are impossible to forget.
What Do Mexican Hot Chocolate Brownies Taste Like?
Mexican hot chocolate brownies taste like your favorite fudgy brownie -then turned up several notches. The base is deeply chocolatey and dense, with cocoa powder and chopped dark chocolate working together to create an intensely rich, bittersweet flavor.
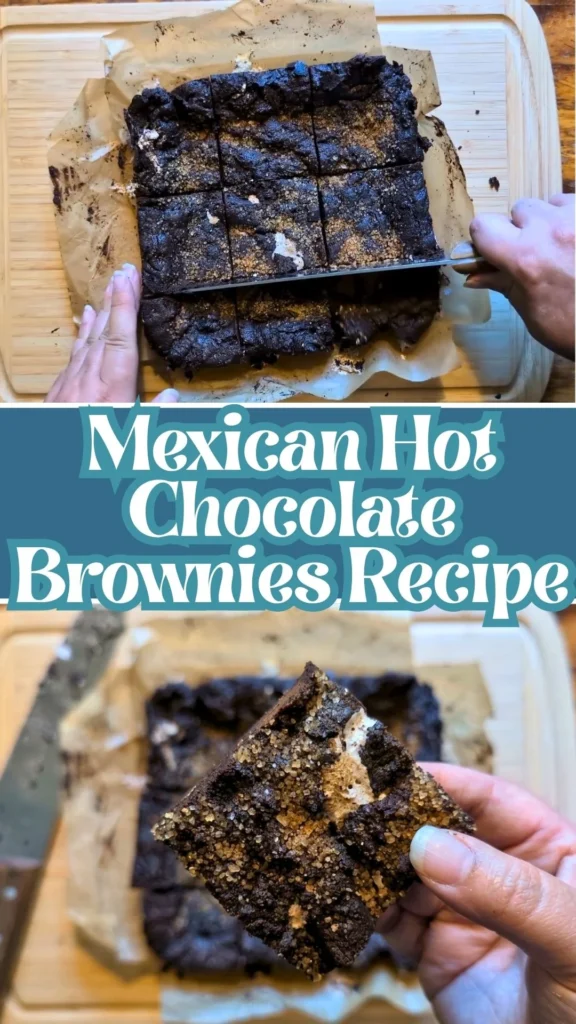
Cinnamon weaves in a warm, fragrant sweetness, while black pepper and cayenne pepper add a slow, building heat that lingers pleasantly at the back of your throat – just like a cup of authentic Mexican hot chocolate.
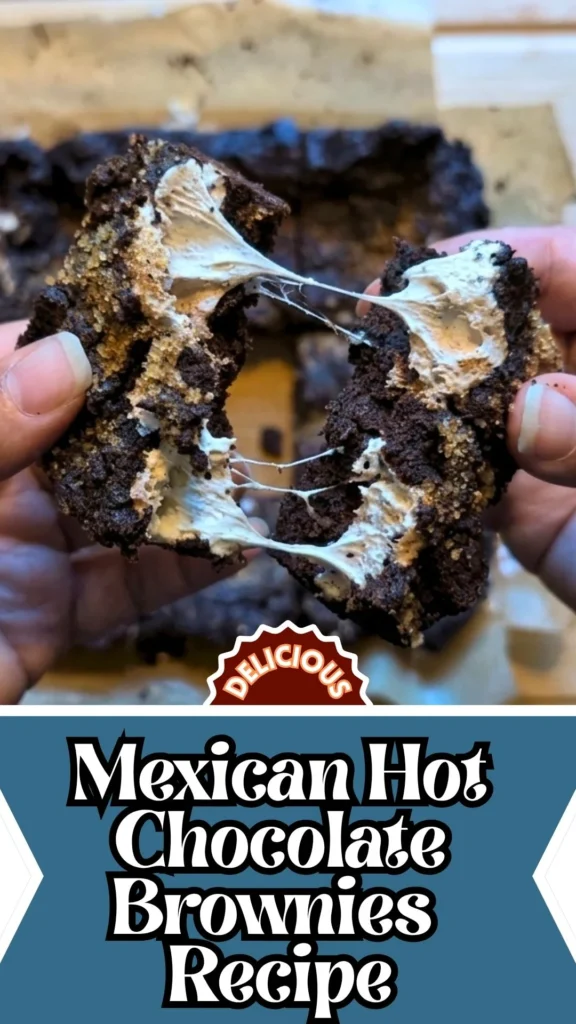
The hidden marshmallow layer adds a pillowy, gooey sweetness in the center, and the cinnamon sugar and flaky sea salt topping gives every bite a satisfying crunch and a perfectly balanced finish.
Ingredients for Mexican Hot Chocolate Brownies
Dry Ingredients
- All-purpose flour
- Unsweetened cocoa powder
- Baking soda
- Salt
- Ground cinnamon
- Black pepper
- Cayenne pepper
Wet Ingredients and Mix-Ins
- Unsalted butter
- Brown sugar
- Granulated sugar
- Eggs
- Pure vanilla extract
- Chopped dark chocolate
Marshmallow Layer
- Marshmallow fluff
For the Sugar Top Coating
- Raw sugar or granulated sugar
- Ground cinnamon
- Flaky sea salt
Kitchen Utensils You Will Need
- Stand mixer with paddle attachment (or hand mixer and large bowl)
- Two mixing bowls (one medium, one large)
- Whisk
- Rubber spatula
- Parchment-lined baking dish (8×8 or 9×13 depending on preferred thickness)
- Offset spatula or back of a spoon for spreading
- Small bowl for the sugar topping
- Sharp knife for slicing
Preparation Time, Cooking Time, and Servings
- Preparation Time: 25 minutes
- Chill Time: 4 hours minimum (or overnight)
- Baking Time: 25–35 minutes at 350°F (175°C)
- Total Time: Approximately 5 hours including chill
- Servings: Makes 12–16 brownies depending on slice size
How to Make Mexican Hot Chocolate Brownies: Step-by-Step Instructions
1. Combine the dry ingredients
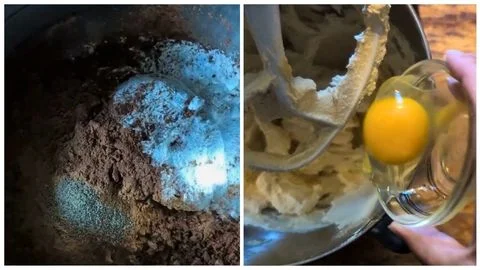
In a medium bowl, whisk together the all-purpose flour, cocoa powder, baking soda, salt, ground cinnamon, black pepper, and cayenne pepper until completely and evenly blended. Set aside.
2. Mix the wet ingredients
In a stand mixer fitted with the paddle attachment, cream the butter, brown sugar, and granulated sugar together on medium speed until smooth and well combined. Add the eggs one at a time, mixing after each addition. Pour in the vanilla extract and mix until fully incorporated.
3. Incorporate the dry ingredients
With the mixer on low speed, add the dry ingredient mixture to the wet ingredients in two separate additions, mixing gently between each. Stop as soon as no dry streaks remain -do not overmix.
4. Fold in the dark chocolate
Remove the bowl from the mixer and use a rubber spatula to fold in the chopped dark chocolate until evenly distributed throughout the batter.
5. Form the base layer
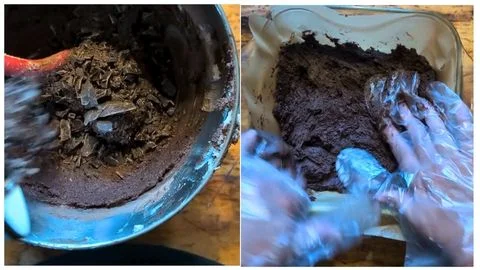
Spread approximately half of the brownie batter into a parchment-lined baking dish, pressing it down evenly with an offset spatula or the back of a spoon to create a smooth, even base.
6. Add the marshmallow layer
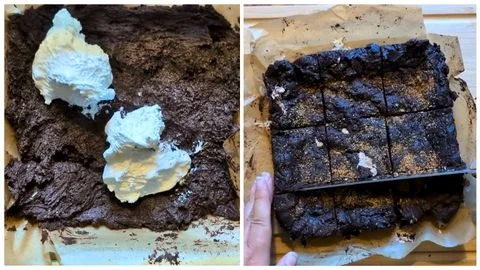
Scoop a generous amount of marshmallow fluff over the base layer and spread it out as evenly as possible, leaving a small border around the edges so it does not seep out during baking.
7. Add the top layer
Spoon the remaining brownie batter over the marshmallow layer in dollops, then gently press and smooth it to fully cover the fluff. Work carefully to avoid disturbing the marshmallow layer underneath.
8. Chill the assembled brownies
Cover the baking dish and place it in the refrigerator to chill for at least 4 hours, or overnight for the best results. Chilling allows the layers to set firmly and improves the final texture dramatically.
9. Bake
When ready to bake, preheat your oven to 350°F (175°C). Remove the baking dish from the refrigerator and bake for 25 to 35 minutes, until the top is set and a toothpick inserted into the center comes out with moist crumbs but no wet batter.
10. Top and serve
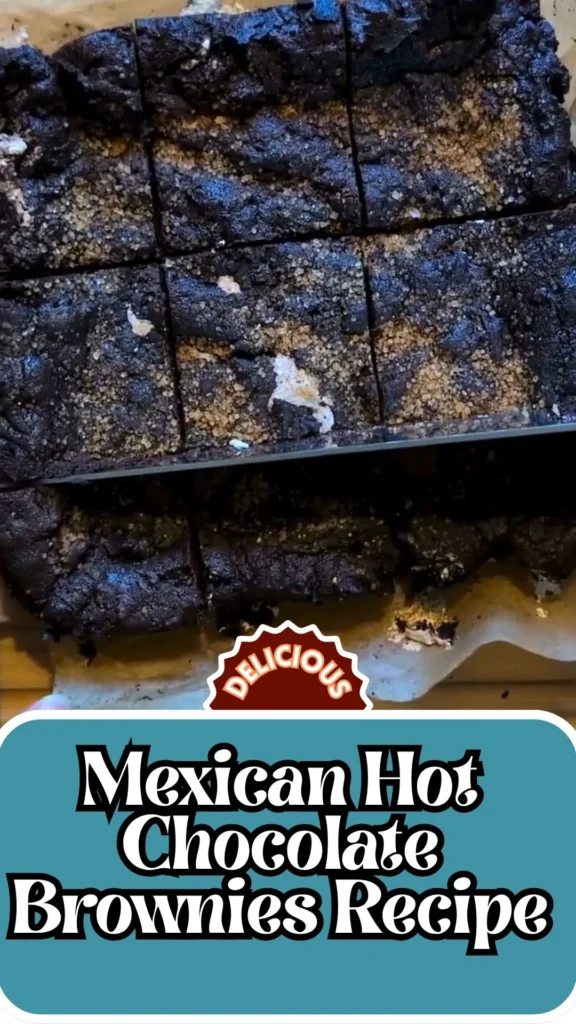
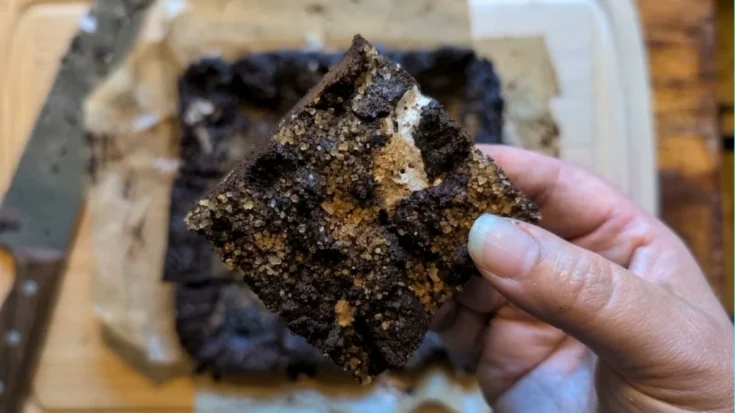
In a small bowl, stir together the sugar, cinnamon, and flaky sea salt. Sprinkle the mixture generously and evenly across the top of the warm brownies. Allow to cool before slicing into squares and serving.
Customization and Pairing Ideas for Mexican Hot Chocolate Brownies
1. Use Abuelita Chocolate for Authentic Flavor
To make abuelita Mexican hot chocolate brownies, replace part of the cocoa powder or some of the chopped dark chocolate with grated or melted Abuelita chocolate tablets. Abuelita chocolate is already sweetened and spiced with cinnamon, which deepens the traditional Mexican hot chocolate flavor profile and gives the brownies an unmistakably authentic character that takes the recipe to another level.
2. Make Mexican Hot Chocolate Brownies From Mix
Short on time? You can create a simplified version of Mexican hot chocolate brownies from mix by starting with your favorite boxed brownie mix and simply stirring in 1 teaspoon of ground cinnamon, a pinch of cayenne pepper, and a handful of chopped dark chocolate before following the rest of this recipe. Add the marshmallow layer and spiced sugar topping exactly as written for a result that is still incredibly impressive with minimal effort.
3. Add a Cream Cheese Swirl
Before adding the marshmallow layer, dot the base with small spoonfuls of sweetened cream cheese (cream cheese mixed with powdered sugar and vanilla) and swirl lightly with a skewer. This creates a tangy, creamy contrast that balances the intensity of the spiced chocolate batter beautifully.
4. Top With a Mexican Chocolate Ganache
Once the brownies have fully cooled, pour a simple ganache made from warm heavy cream and chopped dark chocolate spiked with a pinch of cinnamon and cayenne over the top. Let it set before slicing for a glossy, ultra-rich finish that makes these Mexican hot chocolate brownies look truly bakery-worthy.
5. Serve With Mexican Hot Chocolate or Café de Olla
Pair a warm square of these brownies with a mug of frothy Mexican hot chocolate or a cup of café de olla -traditional Mexican coffee brewed with cinnamon and piloncillo. The shared spice notes between the brownie and the drink create a seamless, warming pairing that feels deeply comforting and cohesive.
6. For Even more Bakery Style Treats.
If you love rich chocolate desserts, don’t miss our Hooters Chocolate Mousse Cake Recipe and Fresh Market Kitchen Sink Cookie Recipe for even more bakery-style treats.
7. Serve Warm With Vanilla Ice Cream
Slightly warm a brownie square in the microwave for 15 to 20 seconds and serve it topped with a scoop of vanilla bean ice cream. The contrast of the warm, spiced chocolate brownie against the cold, creamy ice cream is an extraordinary combination -especially when the marshmallow center is still gooey and the cinnamon sugar crust crackles under your spoon.
Expert Tips for Perfect Mexican Hot Chocolate Brownies
1. Balance Your Spice Levels Carefully
The cayenne pepper and black pepper are what separate these Mexican hot chocolate brownies from any ordinary chocolate brownie, but getting the balance right is key. Start conservative with your cayenne -a small pinch goes a long way. You want a warming heat that builds gradually, not an overwhelming spiciness that overpowers the chocolate. Taste your batter before adding the dry ingredients fully to gauge and adjust to your preference.
2. Use High-Quality Dark Chocolate
Since dark chocolate is one of the primary flavor drivers in this recipe, the quality of what you use matters enormously. Choose a dark chocolate bar with at least 60–70% cacao content and chop it by hand rather than using pre-made chips. Hand-chopped chocolate melts into uneven pockets throughout the brownies, creating varying pools of intense chocolate flavor in every slice.
3. Do Not Skip the Chill Time
Chilling the assembled brownies for a minimum of 4 hours before baking is not optional -it is what makes this recipe work. The chill time allows the marshmallow layer to firm up and hold its shape during baking rather than melting and bubbling out through the top layer. It also helps the batter layers bond together, giving you clean, defined layers when you slice into the finished brownies.
4. Line Your Pan With Parchment Generously
When lining your baking dish with parchment paper, leave enough overhang on all sides to act as handles. This makes lifting the entire slab of brownies out of the pan effortless and prevents any tearing or sticking when you go to slice them. Lightly greasing the parchment with butter or cooking spray adds extra insurance.
5. Press the Top Layer Gently
When spreading the second layer of batter over the marshmallow fluff, use a light, patient touch. Working too aggressively with your spatula will drag the marshmallow layer out of position and cause the two to mix together rather than staying as distinct, separate layers. Drop the batter in small spoonfuls across the surface and then smooth it slowly with an offset spatula or damp fingertips.
6. Watch the Oven Carefully
The marshmallow layer inside these brownies retains heat and moisture differently than a standard brownie, which can make judging doneness tricky. Begin checking at the 25-minute mark. The top should look matte and set, and a toothpick inserted in the center should come out with moist crumbs rather than wet batter. Overbaking will dry out the brownie layers and cause the marshmallow to become rubbery rather than soft and gooey.
7. Add the Sugar Topping at the Right Time
For the best texture and visual impact, sprinkle the cinnamon sugar and flaky sea salt topping over the brownies while they are still slightly warm from the oven. The residual heat helps the sugar adhere to the surface, giving you that satisfying sparkle and crunch. If you add it too early while the brownies are piping hot, the sugar can dissolve into the surface and lose its texture.
Storage and Reheating
Store Mexican hot chocolate brownies in an airtight container at room temperature for up to 4 days, or refrigerate for up to 7 days. To reheat, microwave individual squares for 15 to 20 seconds. The marshmallow center softens beautifully when warmed. Brownies can also be frozen for up to 2 months -thaw overnight in the refrigerator before serving.
Common Queries and FAQs
What makes these Mexican hot chocolate brownies different from regular brownies?
Unlike standard chocolate brownies, Mexican hot chocolate brownies are spiced with ground cinnamon, black pepper, and cayenne pepper -the same flavor profile found in traditional Mexican hot chocolate. A hidden marshmallow fluff layer adds a gooey center, and the cinnamon sugar and flaky sea salt topping adds a crunch and complexity you simply do not get from a classic brownie recipe.
Can I make abuelita Mexican hot chocolate brownies with this recipe?
Yes. To make abuelita Mexican hot chocolate brownies, substitute part of the chopped dark chocolate with grated Abuelita chocolate tablets. Abuelita chocolate contains cinnamon and sugar already, so you may want to slightly reduce the added cinnamon and granulated sugar in the recipe to keep the sweetness balanced.
How do I make Mexican hot chocolate brownies from mix?
To make Mexican hot chocolate brownies from mix, start with your favorite boxed brownie mix and add 1 teaspoon of ground cinnamon, a pinch of cayenne pepper, and ½ cup of chopped dark chocolate to the batter. Assemble with the marshmallow layer and cinnamon sugar topping exactly as described in this recipe for a quick, spiced, fudgy result.
Why do I need to chill the brownies before baking?
Chilling is essential because it allows the marshmallow fluff layer to firm up before it goes into the oven. Without chilling, the heat causes the fluff to liquefy and push through the top batter layer, disrupting the distinct layered structure and making the brownies difficult to slice cleanly.
Can I adjust the spice level?
Absolutely. The cayenne and black pepper levels in this Mexican hot chocolate brownies recipe are fully adjustable. For a milder heat, start with just a tiny pinch of cayenne. For a bold, fiery kick, increase it gradually to your preference. The cinnamon level can also be adjusted -more cinnamon brings the flavors even closer to a classic cup of Mexican hot chocolate.
Can I freeze Mexican hot chocolate brownies?
Yes. Once fully cooled and sliced, place brownie squares on a parchment-lined tray and freeze until solid, then transfer to an airtight freezer bag. They keep well for up to 2 months. Thaw individually at room temperature or overnight in the refrigerator. For a warm treat, microwave a thawed brownie for 15 seconds before serving.
Do the brownies need to be refrigerated?
They do not need to be refrigerated, but because of the marshmallow layer, storing them in the refrigerator extends their freshness significantly. At room temperature in an airtight container, they stay fresh for up to 4 days. Refrigerated, they last up to a week and the layers remain clean and well-defined when sliced cold.
Mexican Hot Chocolate Brownies Recipe
If you love bold flavors and crave something more exciting than an ordinary brownie, this Mexican hot chocolate brownies recipe is about to become your new obsession.
Ingredients
- All-purpose flour
- Unsweetened cocoa powder
- Baking soda
- Salt
- Ground cinnamon
- Black pepper
- Cayenne pepper
- Unsalted butter
- Brown sugar
- Granulated sugar
- Eggs
- Pure vanilla extract
- Chopped dark chocolate
- Marshmallow fluff
- Raw sugar or granulated sugar
- Ground cinnamon
- Flaky sea salt
Instructions
1. Combine the dry ingredients
In a medium bowl, whisk together the all-purpose flour, cocoa powder, baking soda, salt, ground cinnamon, black pepper, and cayenne pepper until completely and evenly blended. Set aside.
2. Mix the wet ingredients
In a stand mixer fitted with the paddle attachment, cream the butter, brown sugar, and granulated sugar together on medium speed until smooth and well combined. Add the eggs one at a time, mixing after each addition. Pour in the vanilla extract and mix until fully incorporated.
3. Incorporate the dry ingredients
With the mixer on low speed, add the dry ingredient mixture to the wet ingredients in two separate additions, mixing gently between each. Stop as soon as no dry streaks remain -do not overmix.
4. Fold in the dark chocolate
Remove the bowl from the mixer and use a rubber spatula to fold in the chopped dark chocolate until evenly distributed throughout the batter.
5. Form the base layer
Spread approximately half of the brownie batter into a parchment-lined baking dish, pressing it down evenly with an offset spatula or the back of a spoon to create a smooth, even base.
6. Add the marshmallow layer
Scoop a generous amount of marshmallow fluff over the base layer and spread it out as evenly as possible, leaving a small border around the edges so it does not seep out during baking.
7. Add the top layer
Spoon the remaining brownie batter over the marshmallow layer in dollops, then gently press and smooth it to fully cover the fluff. Work carefully to avoid disturbing the marshmallow layer underneath.
8. Chill the assembled brownies
Cover the baking dish and place it in the refrigerator to chill for at least 4 hours, or overnight for the best results. Chilling allows the layers to set firmly and improves the final texture dramatically.
9. Bake
When ready to bake, preheat your oven to 350°F (175°C). Remove the baking dish from the refrigerator and bake for 25 to 35 minutes, until the top is set and a toothpick inserted into the center comes out with moist crumbs but no wet batter.
10. Top and serve
In a small bowl, stir together the sugar, cinnamon, and flaky sea salt. Sprinkle the mixture generously and evenly across the top of the warm brownies. Allow to cool before slicing into squares and serving.
Notes
Store Mexican hot chocolate brownies in an airtight container at room temperature for up to 4 days, or refrigerate for up to 7 days. To reheat, microwave individual squares for 15 to 20 seconds. The marshmallow center softens beautifully when warmed. Brownies can also be frozen for up to 2 months -thaw overnight in the refrigerator before serving.
Nutrition Information:
Yield:
12Serving Size:
1Amount Per Serving: Calories: 345
I’d love to hear your thoughts-leave a comment on the blog and let me know How it came out! Don’t forget to follow me on Pinterest, Facebook and YouTube for more delicious updates. Your support truly means everything to me.