
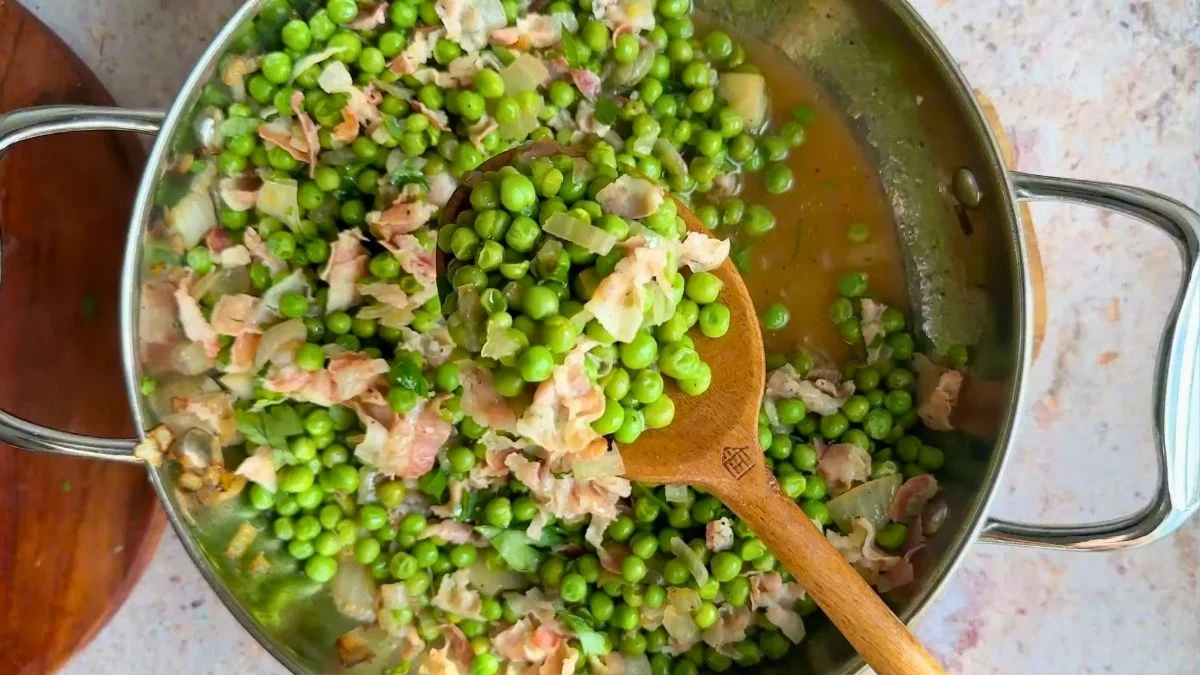
If you are looking for a side dish that is effortless to make yet packed with bold, savory flavor, this peas and pancetta recipe is about to become your new kitchen staple.
Inspired by the classic Italian combination of sweet green peas and salty cured pork, this dish comes together in under 30 minutes with just a handful of simple ingredients.
Made famous by home cooks and celebrated chefs alike -including the popular Ina Garten peas and pancetta version -this recipe proves that the best food does not have to be complicated. Whether you are serving it alongside a roast, a pasta dish, or a weeknight dinner, peas and pancetta delivers every single time.
What Do Peas and Pancetta Taste Like?
Peas and pancetta is the kind of dish that surprises you with how much flavor comes from so few ingredients. The pancetta brings a rich, salty, slightly smoky depth that infuses every bite, while the yellow onion adds a sweet, savory base that rounds everything out beautifully.
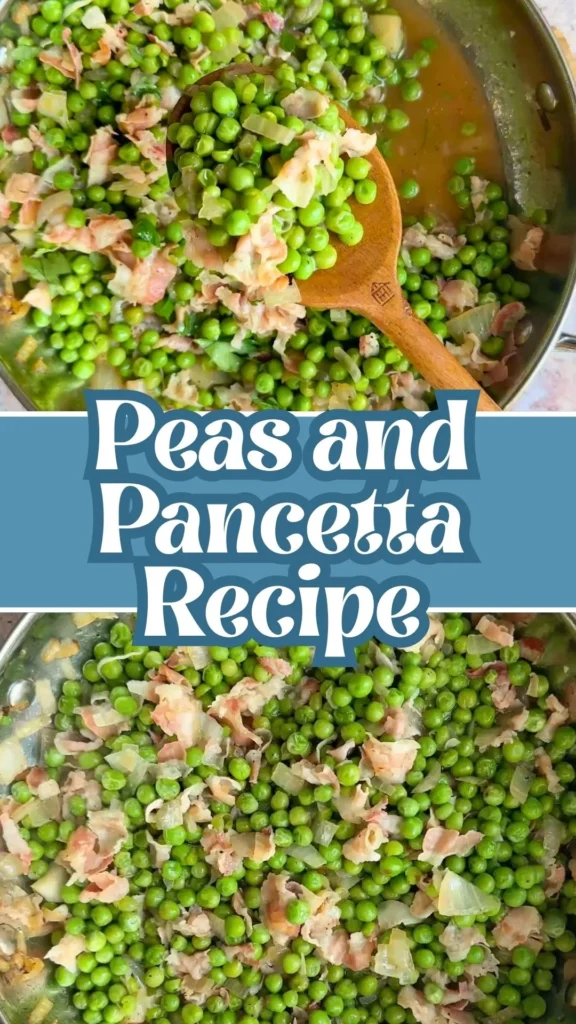
The frozen peas stay tender and vibrant, offering a natural sweetness that balances the richness of the cured pork perfectly. A drizzle of good extra virgin olive oil ties the whole dish together, and the fresh parsley added at the end brings a bright, herby finish.
It is rustic, hearty, and deeply satisfying in the most comforting Italian way. Serve this flavorful side with our Fresh Kitchen Steak Recipe for a complete and satisfying Tasty meal.
Ingredients for Peas and Pancetta
- 1 yellow onion, finely chopped
- 1 entire 4 oz container of pancetta, sliced and then diced
- A few tablespoons of extra virgin olive oil (do not skimp – it combines with the cooking juices to build real depth of flavor)
- Frozen peas (one standard bag, approximately 10 oz)
- ¾ cup water
- Black pepper, to taste
- Salt, to taste
- Fresh flat-leaf parsley, chopped, to finish
Kitchen Utensils You Will Need
- Large skillet or sauté pan with a lid
- Sharp chef’s knife
- Cutting board
- Wooden spoon or spatula
- Measuring cup
- Serving spoon
Preparation Time, Cooking Time, and Servings
- Preparation Time: 10 minutes
- Cooking Time: 25 minutes
- Total Time: 35 minutes
- Servings: 4 as a side dish
How to Make Peas and Pancetta: Step-by-Step Instructions
1. Prep your ingredients
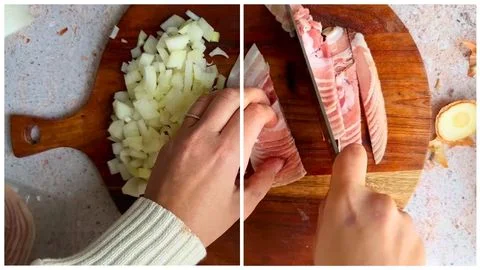
Finely chop the yellow onion. Take your sliced pancetta and give it a rough dice into small pieces. Having everything prepped before you start cooking makes the process smooth and stress-free.
2. Sauté the base
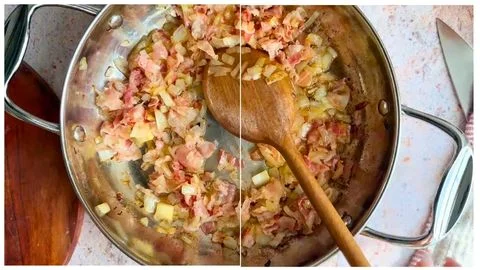
Heat a few generous tablespoons of extra virgin olive oil in a large skillet over medium heat. Add the chopped onion and diced pancetta to the pan. Cook everything together for about 10 minutes, stirring occasionally, until the onion is soft and golden and the pancetta has cooked down and developed some color.
Note: the pancetta will not turn crispy -simply look for it to brown slightly and render its fat into the oil.
3. Season with black pepper
During the sauté stage, season the onion and pancetta mixture generously with freshly ground black pepper. This is the time to build the flavor base, so do not be shy.
4. Add the peas and water
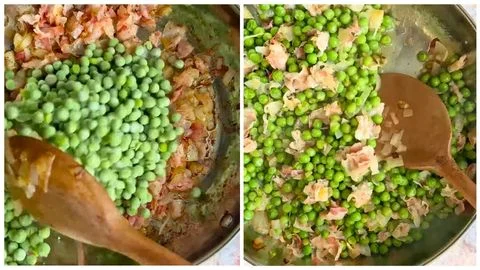
Add the frozen peas directly to the skillet along with approximately ¾ cup of water. Stir everything together to combine. The water will help the peas cook through gently and will also meld with the olive oil and pancetta juices to create a light, flavorful cooking liquid.
5. Simmer together
Cook the peas and pancetta mixture over medium heat for about 15 minutes, stirring occasionally, until the peas are tender and have absorbed the savory flavors of the pancetta and onion.
6. Finish and serve
Taste and season well with salt toward the end of cooking -the pancetta already brings saltiness, so always season at the end to avoid over-salting.
Stir in a generous handful of freshly chopped parsley just before serving for a bright, fresh finish.
Customization and Pairing Ideas for Peas and Pancetta
1. Serve Over Creamy Polenta
Spoon your peas and pancetta over a bowl of warm, buttery polenta for a hearty and comforting Italian-inspired meal. The creamy texture of the polenta soaks up the savory cooking juices beautifully, turning this simple side dish into a satisfying main course that feels rustic and deeply nourishing.
2. Toss With Pasta
One of the most popular ways to enjoy peas and pancetta is tossed through freshly cooked pasta. Rigatoni, penne, or orecchiette work especially well. Simply cook your pasta al dente, reserve a cup of pasta water, and toss the cooked pasta directly into the skillet with the peas and pancetta. Add a splash of pasta water to loosen the sauce and finish with grated Pecorino or Parmesan.
3. Add a Splash of White Wine
For an elevated flavor profile, deglaze the pan with a splash of dry white wine after the onion and pancetta have browned. Let it cook off for a minute before adding the peas and water. This technique, inspired by classic Italian cooking, adds a subtle acidity and complexity that makes this peas and pancetta recipe taste truly restaurant-worthy.
4. Swap Pancetta for Guanciale or Bacon
If you cannot find pancetta at your local grocery store, guanciale -cured pork cheek -is an authentic Italian substitute with a slightly richer, fattier flavor. Smoked bacon works as a more accessible swap and adds a gentle smokiness that pairs beautifully with the sweet peas.
5. Pair With Roasted Chicken or Lamb
This dish makes a phenomenal pairing alongside a simple roasted chicken, rack of lamb, or pan-seared pork chops. The salty, savory notes of the pancetta complement roasted and grilled meats effortlessly, making peas and pancetta the ideal side dish for Sunday dinners and special occasions alike.
6. Add Fresh Mint Instead of Parsley
Inspired by British mushy peas and classic Italian preparations, try finishing your dish with fresh mint instead of parsley. The cool, slightly sweet note of mint cuts through the richness of the pancetta and adds an unexpected but delightful brightness that elevates the overall flavor of the dish.
7. Make It Ina Garten Style
The Ina Garten peas and pancetta version is beloved for its simplicity and elegance. To channel her approach, use the best quality extra virgin olive oil you can find, opt for freshly ground black pepper, and be generous with the parsley at the end. Ina always emphasizes that good ingredients do most of the work -and this dish is proof of exactly that.
Expert Tips for Perfect Peas and Pancetta
1. Choose Sliced Pancetta Over Pre-Diced
When shopping for this recipe, reach for a container of sliced pancetta rather than the pre-diced version. Sliced pancetta, once hand-diced at home, integrates more seamlessly into the dish and blends better with the peas during cooking. Pre-diced pancetta tends to be too chunky and can feel uneven in the final dish.
2. Do Not Skimp on the Olive Oil
Extra virgin olive oil is not just a cooking fat in this recipe -it is an active flavor builder. As the pancetta renders and the onions soften, the olive oil absorbs all of those savory juices and infuses them throughout the dish. Use a few generous tablespoons and choose a good-quality extra virgin olive oil for the best results.
3. Cook the Onion and Pancetta Low and Slow
Resist the urge to rush the 10-minute sauté stage. Cooking the onion and pancetta over medium heat for the full time allows the onion to become sweet and jammy while the pancetta slowly renders its fat and develops color. This patient cooking builds the entire flavor foundation of the dish.
4. Season Salt at the End, Not the Beginning
Because pancetta is already a cured, salty meat, adding salt too early in the cooking process can result in an overly salty finished dish. Always hold off on salting until the very end, taste carefully, and adjust from there. This is especially important if you are pairing peas and pancetta with other seasoned components like pasta or polenta.
5. Use Frozen Peas Without Thawing
Add your frozen peas directly from the freezer to the hot skillet -no need to thaw them first. Adding frozen peas straight to the pan keeps them from turning mushy, preserves their vibrant green color, and allows them to slowly absorb the cooking liquid and savory flavors during the 15-minute simmer. Thawed peas tend to overcook easily and lose their texture.
6. Do Not Discard the Cooking Liquid
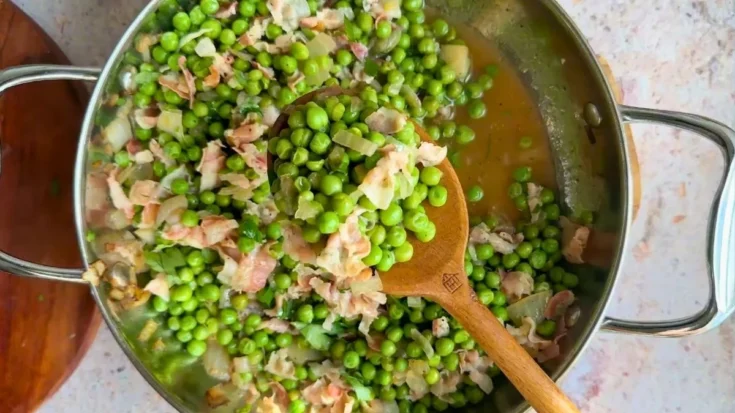
The liquid that develops in the skillet as the peas cook is packed with flavor from the pancetta, onion, olive oil, and pea juices. Rather than draining it off, let it reduce naturally toward the end of cooking until it becomes a light, silky sauce that coats the peas. If you are serving this with pasta, this liquid is liquid gold.
7. Add the Parsley at the Very Last Minute
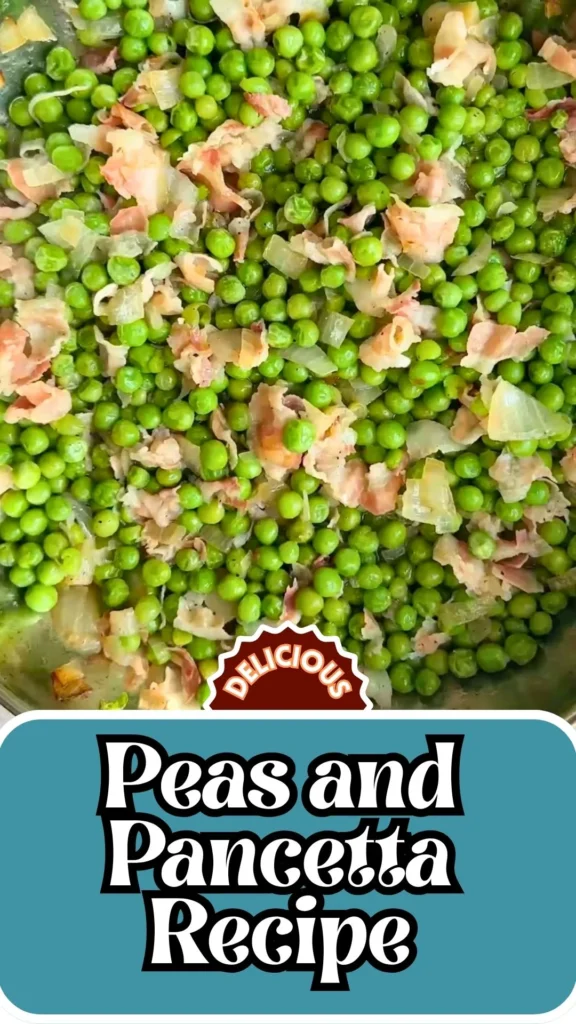
Fresh parsley is a finishing herb, not a cooking herb. Stir it into your peas and pancetta right before plating and serving. Adding it too early will cause the parsley to wilt, turn a dull olive green, and lose its fresh, vibrant flavor. A generous handful of freshly chopped parsley added at the end makes the dish look as beautiful as it tastes.
Storage and Reheating
Store leftover peas and pancetta in an airtight container in the refrigerator for up to 3 days. Reheat gently in a skillet over low heat with a small splash of water or olive oil to loosen. Avoid microwaving on high heat as it can make the peas mushy.
Common Queries and FAQs
Here, you’ll find answers to some common questions about the Peas and Pancetta Recipe that people frequently ask
What is the difference between pancetta and bacon in this recipe?
Pancetta is Italian cured pork belly that is seasoned with salt, pepper, and spices but not smoked, giving it a clean, savory flavor. Bacon is smoked, which adds a distinctive smoky note to the dish. Both work in this peas and pancetta recipe, but pancetta delivers a more authentic Italian flavor profile that lets the sweetness of the peas shine through.
Can I use fresh peas instead of frozen?
Yes, fresh peas can absolutely be used when they are in season. However, frozen peas are the preferred choice for this recipe because they are available year-round, consistent in size and sweetness, and hold their shape well during the cooking process. If using fresh peas, reduce the cooking time slightly as they cook faster than frozen.
What is the Ina Garten peas and pancetta recipe?
The Ina Garten peas and pancetta version is a widely loved adaptation of this classic Italian side dish. Ina’s approach focuses on quality ingredients, proper caramelization of the onion and pancetta, and finishing with fresh herbs. Her recipe emphasizes simplicity -letting each ingredient speak for itself -which is exactly the philosophy behind this recipe as well.
Can I make peas and pancetta ahead of time?
Yes, you can make this dish up to a day ahead and store it covered in the refrigerator. Reheat it gently on the stovetop before serving and stir in fresh parsley at the last moment. The flavors actually deepen overnight, making it a great make-ahead option for dinner parties and gatherings.
Is this recipe gluten-free?
Yes, this peas and pancetta recipe is naturally gluten-free as written. All of the core ingredients -peas, pancetta, onion, olive oil, and herbs -contain no gluten. Always check your pancetta packaging to confirm no gluten-containing additives are present.
What can I serve with peas and pancetta?
Peas and pancetta pairs beautifully with roasted chicken, grilled lamb, pan-seared fish, creamy polenta, or tossed through pasta. It also works wonderfully as part of a larger Italian spread alongside antipasto, bruschetta, or a simple green salad with a lemon vinaigrette.
Peas and Pancetta Recipe
If you are looking for a side dish that is effortless to make yet packed with bold, savory flavor, this peas and pancetta recipe is about to become your new kitchen staple.
Ingredients
- 1 yellow onion, finely chopped
- 1 entire 4 oz container of pancetta, sliced and then diced
- A few tablespoons of extra virgin olive oil (do not skimp – it combines with the cooking juices to build real depth of flavor)
- Frozen peas (one standard bag, approximately 10 oz)
- ¾ cup water
- Black pepper, to taste
- Salt, to taste
- Fresh flat-leaf parsley, chopped, to finish
Instructions
1. Prep your ingredients
Finely chop the yellow onion. Take your sliced pancetta and give it a rough dice into small pieces. Having everything prepped before you start cooking makes the process smooth and stress-free.
2. Sauté the base
Heat a few generous tablespoons of extra virgin olive oil in a large skillet over medium heat. Add the chopped onion and diced pancetta to the pan. Cook everything together for about 10 minutes, stirring occasionally, until the onion is soft and golden and the pancetta has cooked down and developed some color. Note: the pancetta will not turn crispy -simply look for it to brown slightly and render its fat into the oil.
3. Season with black pepper
During the sauté stage, season the onion and pancetta mixture generously with freshly ground black pepper. This is the time to build the flavor base, so do not be shy.
4. Add the peas and water
Add the frozen peas directly to the skillet along with approximately ¾ cup of water. Stir everything together to combine. The water will help the peas cook through gently and will also meld with the olive oil and pancetta juices to create a light, flavorful cooking liquid.
5. Simmer together
Cook the peas and pancetta mixture over medium heat for about 15 minutes, stirring occasionally, until the peas are tender and have absorbed the savory flavors of the pancetta and onion.
6. Finish and serve
Taste and season well with salt toward the end of cooking -the pancetta already brings saltiness, so always season at the end to avoid over-salting. Stir in a generous handful of freshly chopped parsley just before serving for a bright, fresh finish.
Notes
Store leftover peas and pancetta in an airtight container in the refrigerator for up to 3 days. Reheat gently in a skillet over low heat with a small splash of water or olive oil to loosen. Avoid microwaving on high heat as it can make the peas mushy.
Nutrition Information:
Yield:
4Serving Size:
1Amount Per Serving: Calories: 231
I’d love to hear your thoughts-leave a comment on the blog and let me know How it came out! Don’t forget to follow me on Pinterest, Facebook and YouTube for more delicious updates. Your support truly means everything to me.