
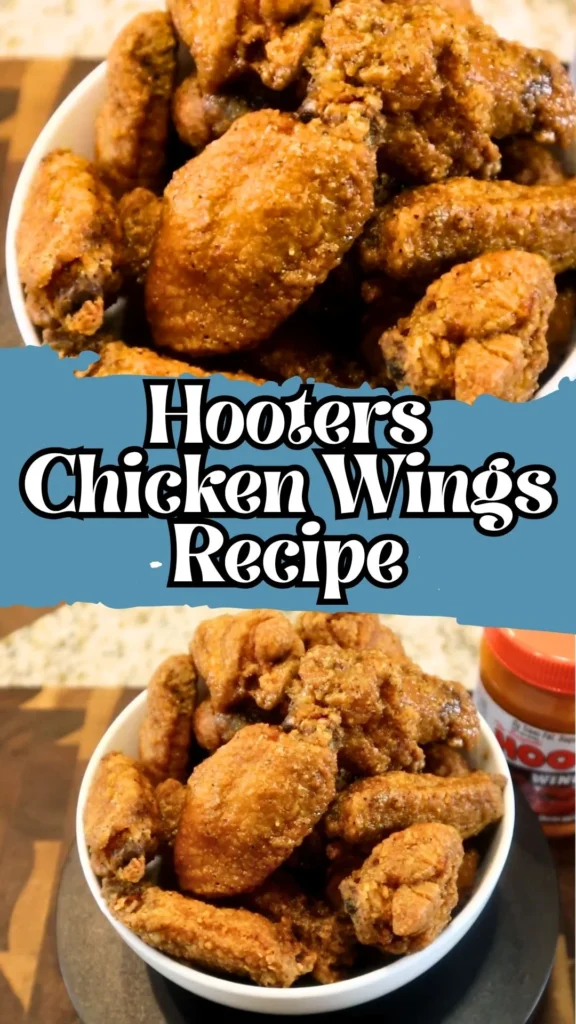
There’s something irresistibly addictive about Hooters chicken wings-that perfect combination of crispy, golden skin enveloping juicy meat, all coated in a glossy, buttery hot sauce that’s just the right amount of spicy.
If you’ve ever wanted to recreate that iconic flavor at home, this Hooters chicken wings recipe delivers authentic restaurant-quality results without leaving your kitchen. The secret lies in a well-seasoned flour coating that creates an ultra-crispy exterior, combined with a simple yet perfectly balanced butter and hot sauce mixture that defines the classic Hooters experience.
Whether you’re hosting game day, craving a late-night snack, or simply want to master how to cook Hooters chicken wings like a pro, this step-by-step guide gives you everything you need to achieve wing perfection every single time.
What Does It Taste Like?
Hooters chicken wings deliver an unforgettable flavor experience that balances richness, heat, and savory depth. The first bite reveals an incredibly crispy, well-seasoned coating that shatters satisfyingly, giving way to tender, juicy chicken that’s been seasoned all the way through-not just on the surface.
The buttery hot sauce coating provides a luxurious mouthfeel with a moderate heat level that builds gradually without overwhelming your palate. You’ll taste prominent garlic notes, a subtle smokiness from paprika, and the complex pepperiness that comes from both cayenne and black pepper working in harmony.
Unlike overly vinegary Buffalo wings, this Hooters chicken wings recipe emphasizes butter’s richness, creating a sauce that clings beautifully to each wing while delivering that signature mild-to-medium spice level that keeps you reaching for more without needing a gallon of ranch dressing.
Ingredients and Kitchen Utensils Lists
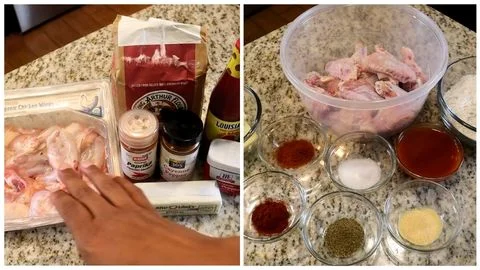
Ingredients
For the chicken:
- 1.5 to 2 pounds chicken wings (separated into flats and drumettes)
- 1 teaspoon Adobo seasoning (or seasoned salt/Lawry’s)
The seasoned flour coating:
- 1.5 cups all-purpose flour
- 2 teaspoons sea salt
- 1 teaspoon cayenne pepper
- 1 teaspoon paprika (smoked or sweet)
- 1 teaspoon black pepper
- 1 teaspoon garlic powder
For the sauce:
- ¾ cup unsalted butter
- ½ cup hot sauce (Louisiana-style or similar; avoid Frank’s RedHot)
- 1 teaspoon black pepper
- 1 teaspoon garlic powder
For frying:
- Vegetable, canola, or peanut oil (enough for deep frying, approximately 6-8 cups)
Kitchen Utensils
- Deep fryer or large heavy-bottomed pot
- Cooking thermometer
- Large mixing bowls (2-3)
- Medium saucepan
- Wire cooling rack
- Baking sheet
- Tongs or slotted spoon
- Paper towels
- Whisk or mixing spoon
- Measuring cups and spoons
- Large bowl for tossing (sauce-safe)
Preparation and Cooking Time with Serving
Prep Time: 15 minutes
Refrigeration Time: 1 to 1.5 hours
Cook Time: 30-40 minutes (depending on batch size)
Total Time: Approximately 2 hours
Servings: 4-6 people (about 16-20 wing pieces)
Difficulty Level: Intermediate
Recipe Instructions with Steps
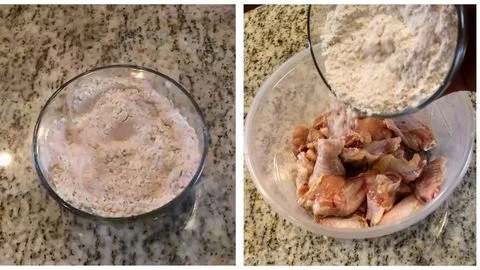
Step 1: Prepare the Seasoned Flour
In a large mixing bowl, combine 1.5 cups all-purpose flour, 2 teaspoons sea salt, 1 teaspoon cayenne pepper, 1 teaspoon paprika, 1 teaspoon black pepper, and 1 teaspoon garlic powder. Whisk thoroughly until all the spices are evenly distributed throughout the flour. This seasoned flour mixture is crucial for creating that signature crispy coating on your Hooters chicken wings. Set the bowl aside while you prepare your chicken.
Step 2: Season the Chicken
Place your 1.5 to 2 pounds of cleaned, separated chicken wings (flats and drumettes) in a separate large bowl. Pat them dry with paper towels if they’re wet-this helps the seasoning adhere better. Sprinkle approximately 1 teaspoon of Adobo seasoning (or your preferred seasoned salt or Lawry’s) evenly over the wings. Toss and mix thoroughly with your hands to ensure every piece is coated. This pre-seasoning step ensures the meat itself is flavorful, not just the coating-a key detail in an authentic Hooters chicken wings recipe.
Step 3: Coat the Wings
Pour the prepared seasoned flour mixture over your seasoned chicken wings. Using clean hands, toss and mix aggressively, ensuring every single wing piece is completely coated with the flour mixture. Press the flour onto any bare spots. The flour should adhere well to the slightly moist surface of the chicken. Don’t be afraid to really work the flour into every crevice-this creates that thick, crispy coating that makes Hooters chicken wings so addictive.
Step 4: Rest in the Fridge
Cover the bowl of coated wings tightly with plastic wrap or transfer to a lidded container. Refrigerate for 1 to 1.5 hours. If you’re pressed for time, a minimum of 45 minutes will work, but longer is better. This resting period allows the flour coating to hydrate and adhere firmly to the chicken, preventing it from falling off during frying. The cold temperature also helps the coating set, resulting in a crispier final texture when the wings hit the hot oil.
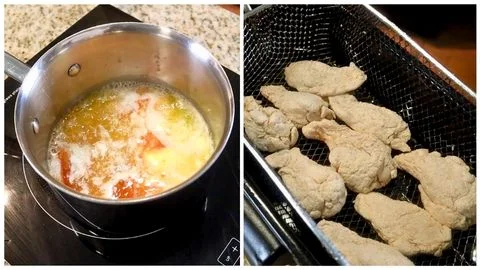
Step 5: Prepare the Sauce
While your wings are chilling, make the iconic sauce. In a medium saucepan over low to medium heat, melt ¾ cup unsalted butter completely. Once melted, add ½ cup hot sauce (Louisiana-style works beautifully-avoid Frank’s RedHot as it already contains butter and will alter the balance), 1 teaspoon black pepper, and 1 teaspoon garlic powder. Stir the mixture gently to combine all ingredients. Allow it to simmer very gently for 3-5 minutes to let the flavors meld together-do not let it boil vigorously. Remove from heat and pour into a large, wide bowl that’s big enough to toss all your wings later. Keep warm but not hot.
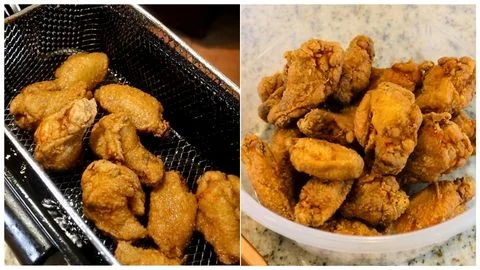
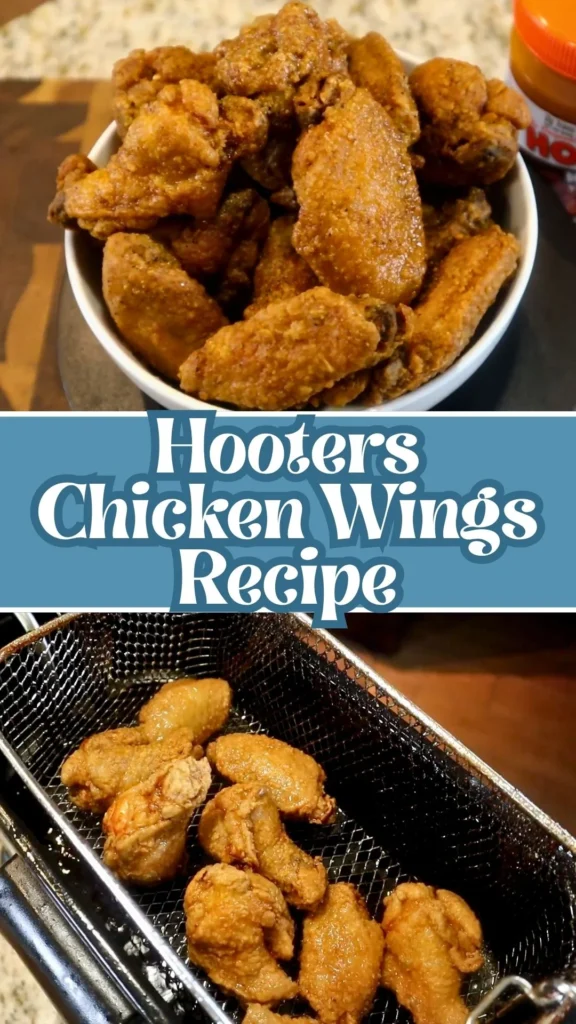
Step 6: Fry the Wings
Fill your deep fryer or large heavy-bottomed pot with enough oil to submerge the wings (about 3-4 inches deep). Heat the oil to 350-375°F-use a cooking thermometer for accuracy. Remove wings from the refrigerator. Working in batches to avoid overcrowding (which drops oil temperature and creates soggy wings), carefully lower 5-7 wing pieces into the hot oil using tongs. Fry for 7-10 minutes for smaller wings, or up to 12-14 minutes for larger pieces. You’ll know they’re done when they’re deeply golden brown, crispy, floating to the surface, and have reached an internal temperature of 165°F. Remove with a slotted spoon or tongs and place on a wire cooling rack set over a baking sheet to drain excess oil. Keep finished wings warm in a 200°F oven while you fry the remaining batches.
Step 7: Toss in Sauce
Once all your Hooters chicken wings are fried and still hot, place them all into the large bowl containing your warm butter-hot sauce mixture. Using tongs or by carefully shaking the bowl (cover with a lid or plate if doing this), toss the wings vigorously to coat each piece completely in the glossy, buttery sauce. The sauce should cling to the crispy coating, creating that signature sticky-yet-crispy texture. Work quickly while the wings are still hot-the heat helps the sauce adhere better.
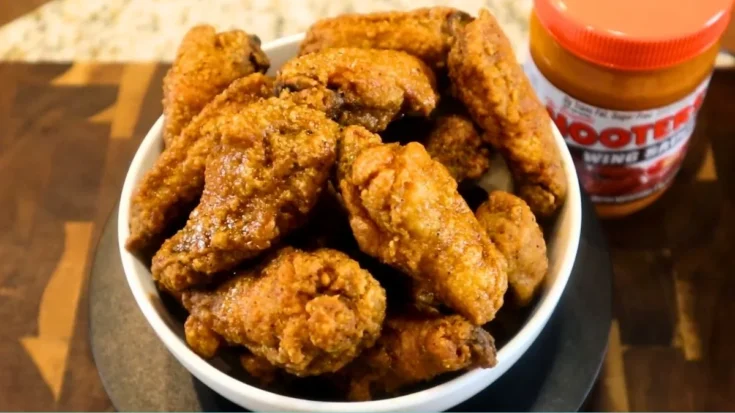
Step 8: Serve
Transfer your perfectly sauced Hooters chicken wings to a serving platter immediately. Serve hot alongside classic accompaniments like celery sticks, carrot sticks, and ranch or blue cheese dressing for dipping. The wings are best enjoyed fresh and hot, when the coating is at its crispiest and the sauce is still warm and glossy. Don’t forget plenty of napkins-these are gloriously messy in the best possible way!
Customization and Pairing for Serving Ideas
1. Heat Level Variations
The beauty of this Hooters chicken wings recipe is its adaptability to different spice preferences. For mild wings perfect for kids or heat-sensitive guests, reduce the cayenne pepper to ½ teaspoon in the flour and use a milder hot sauce like original Tabasco. For medium heat closer to the restaurant version, follow the recipe exactly. If you crave serious fire, increase cayenne to 1.5 teaspoons and add ½ teaspoon of crushed red pepper flakes to the sauce. For extreme heat enthusiasts, substitute half the hot sauce with habanero or ghost pepper sauce-just remember to warn your guests!
2. Flavor Profile Alternatives
While the classic butter-hot sauce combination defines Hooters chicken wings, you can create delicious variations using the same frying technique. Try a honey-garlic version by mixing melted butter with honey, minced fresh garlic, and soy sauce. For Asian-inspired wings, toss in a mixture of melted butter, sriracha, rice vinegar, and sesame oil, then garnish with sesame seeds and scallions. A dry rub version skips the wet sauce entirely-after frying, toss wings in a mixture of brown sugar, smoked paprika, garlic powder, and chili powder for a Memphis-style experience.
3. Classic Accompaniments and Dipping Sauces
Authentic Hooters chicken wings shine when paired with traditional sides. Serve with thick-cut celery and carrot sticks-the cool, crisp vegetables provide textural contrast and help cool your palate between bites. Homemade ranch dressing (buttermilk, mayo, sour cream, dill, garlic, and chives) offers creamy relief from the heat. Blue cheese dressing with chunky Gorgonzola provides a tangy, funky counterpoint. Don’t forget crispy french fries or sweet potato fries on the side, along with coleslaw for a complete wing feast experience.
4. Beverage Pairings
The rich, buttery heat of these wings calls for beverages that can cut through the fat and complement the spice. Ice-cold beer is the classic choice-light lagers, crisp pilsners, or hoppy IPAs all work wonderfully. For non-alcoholic options, serve ice-cold lemonade, sweet tea, or cola. The carbonation and sweetness help cleanse your palate between wings. For wine lovers, an off-dry Riesling or sparkling rosé provides the perfect balance of sweetness and acidity to handle the heat without overwhelming the flavors.
5. Game Day Presentation
Transform your Hooters chicken wings into the centerpiece of an impressive game day spread. Arrange wings on a large wooden board or platter lined with parchment paper. Create small bowls of different dipping sauces strategically placed around the wings. Add celery and carrot sticks in mason jars for vertical visual interest. Include small bowls of pickled jalapeños, pickles, and lemon wedges. Set out warm, wet towels or have a bowl of warm lemon water with hand towels nearby for easy cleanup-your guests will appreciate the thoughtfulness.
6. Oven-Baked Alternative Method
While frying produces the most authentic Hooters chicken wings texture, you can achieve a healthier baked version that’s still delicious. After coating and refrigerating, arrange wings on a wire rack set over a baking sheet. Spray lightly with cooking oil. Bake at 425°F for 45-50 minutes, flipping halfway through, until crispy and golden. The texture won’t be quite as shatteringly crisp as fried, but you’ll save significant calories while still enjoying that addictive sauce. Toss in the butter-hot sauce mixture exactly as described in the original recipe.
7. Wing Bar for Parties
Create an interactive wing experience by setting up a DIY sauce station. Fry all the wings plain (using the seasoned flour coating) and keep them warm in a chafing dish or low oven. Prepare 3-4 different sauce options in separate bowls: classic butter-hot sauce, BBQ, teriyaki-ginger, and honey-sriracha. Let guests toss their own wings in their preferred sauce using tongs and individual small bowls. This approach accommodates different taste preferences and dietary restrictions while making your party feel like an upscale wing restaurant experience. Label each sauce with heat levels for easy navigation.
Tips Section
1. The Science of the Perfect Crispy Coating
The refrigeration step in this Hooters chicken wings recipe isn’t optional-it’s scientifically crucial. When flour meets the chicken’s surface moisture, it begins to form a paste that needs time to set. Refrigerating for 1-1.5 hours allows the flour coating to hydrate fully and bond to the chicken skin, creating a barrier that becomes incredibly crispy when fried. The cold temperature also firms up the chicken’s fat, which prevents excessive grease absorption during frying. If you’re in a rush, 45 minutes is the absolute minimum, but you’ll notice a difference in coating adhesion. For best results, coat your wings the night before and refrigerate overnight.
2. Why Not Frank’s RedHot?
While Frank’s RedHot is America’s most popular wing sauce base, this Hooters chicken wings recipe specifically avoids it because Frank’s already contains butter and other emulsifiers. When you add ¾ cup of butter to Frank’s, you’re essentially double-buttering your sauce, which can make it greasy, separated, and lacking the bright, vinegary heat that defines Hooters’ flavor. Louisiana-style hot sauce (like Louisiana Brand, Crystal, or Tabasco) contains primarily peppers, vinegar, and salt-giving you complete control over the butter ratio. This creates a cleaner, more balanced sauce with the exact texture and flavor profile you remember from the restaurant.
3. Oil Temperature Mastery
Maintaining proper oil temperature (350-375°F) is the single most important factor in achieving crispy, non-greasy Hooters chicken wings. Too low (below 325°F), and wings absorb excessive oil, becoming soggy and greasy. Too high (above 400°F), and the coating burns before the chicken cooks through. Invest in a reliable deep-fry or candy thermometer-digital models with alarms are ideal. When you add wings to the oil, the temperature will drop 25-50 degrees; this is normal. Allow it to recover between batches. Fry in small batches of 5-7 pieces maximum. If your oil starts smoking, it’s too hot- from heat immediately and let it cool slightly.
4. The Double-Fry Technique for Ultimate Crispiness
Professional wing joints often use a double-fry method for maximum crispiness, and you can apply this technique to your Hooters chicken wings recipe for competition-level results. First fry the wings at 325°F for about 8 minutes until just cooked through but pale. Remove and let them rest on a rack for 10-15 minutes (or up to 2 hours at room temperature). For the second fry, increase oil temperature to 375°F and fry for 3-4 minutes until deeply golden and extra crispy. This method cooks the chicken gently first, then crisps the coating aggressively, resulting in a shatteringly crisp exterior and perfectly juicy interior every time.
5. Pre-Seasoning the Meat Makes All the Difference
Many home cooks only season the coating, but authentic Hooters chicken wings are flavorful all the way through. The Adobo seasoning (or seasoned salt) applied directly to the naked wings before coating penetrates the meat during the refrigeration period, ensuring every bite is savory and delicious-not just the crispy exterior. If you can’t find Adobo seasoning, make your own by mixing equal parts garlic powder, onion powder, oregano, and salt. This pre-seasoning step is what separates good wings from great wings, giving you restaurant-quality depth of flavor.
6. Sauce Temperature and Consistency Control
The Hooters chicken wings sauce should be warm but not hot when you toss the wings-if it’s too hot, it can make the coating soggy; if it’s cold, it won’t coat evenly. After making the sauce, keep it in a bowl at room temperature or very gently warm (around 100-110°F). The butter-based sauce should be glossy and pourable but not separated or oily. If your sauce looks greasy or separated, it’s too hot-whisk vigorously while it cools slightly to re-emulsify. For thicker coating, use slightly less hot sauce; for a thinner, more Buffalo-style coating, add an extra 2 tablespoons of hot sauce to the mixture.
7. Storage and Reheating for Best Results
Understanding how to reheat Hooters chicken wings properly preserves their texture and flavor. Never microwave-it makes the coating rubbery and soggy. Instead, store leftover wings in an airtight container in the refrigerator for up to 3 days. To reheat, arrange wings on a wire rack over a baking sheet and bake at 375°F for 12-15 minutes until heated through and the coating re-crisps. For extra crispiness, broil for the final 2 minutes, watching carefully to prevent burning. If wings seem dry, brush with a thin layer of melted butter before reheating. You can also reheat in an air fryer at 350°F for 6-8 minutes-this method produces results closest to freshly fried.
Storage and Reheating Guidance
Store leftover Hooters chicken wings in an airtight container in the refrigerator for up to 3 days. For how to reheat Hooters chicken wings while maintaining crispiness, place on a wire rack over a baking sheet and reheat in a 375°F oven for 12-15 minutes. Alternatively, use an air fryer at 350°F for 6-8 minutes. Never microwave, as it destroys the crispy coating.
Common Queries and FAQs Section
Here, we’ve got you covered with some common questions about the Recipe that people often ask.
Q: Can I make Hooters chicken wings without a deep fryer?
A: Absolutely! You can successfully make Hooters chicken wings using a large, heavy-bottomed pot or Dutch oven filled with 3-4 inches of oil. The key is maintaining proper temperature (350-375°F) using a cooking thermometer. A pot actually gives you more control than some home deep fryers. Alternatively, the oven-baked method mentioned in the customization section produces excellent results with less oil-just don’t expect quite the same shatteringly crisp texture as deep frying.
Q: What’s the best hot sauce to use for authentic Hooters flavor?
A: Louisiana-style hot sauces work best for this Hooters chicken wings recipe because they’re primarily vinegar and peppers without added butter. Louisiana Brand, Crystal, or even original Tabasco are excellent choices. Avoid Frank’s RedHot, which already contains butter and will make your sauce too greasy. The goal is a clean, bright heat that balances perfectly with the ¾ cup butter you’re adding separately, giving you complete control over the final flavor and consistency.
Q: How do I keep my wings crispy after tossing them in sauce?
A: The key to maintaining crispiness when learning how to cook Hooters chicken wings is sauce temperature and timing. Keep your butter-hot sauce mixture warm (not hot) and toss the wings immediately after frying while they’re still piping hot. The hot wings will help the sauce set quickly rather than soaking into the coating. Serve immediately-the longer sauced wings sit, the more the coating softens. If making for a party, consider saucing wings in small batches as you serve them rather than all at once.
Q: Can I prepare the wings in advance for a party?
A: Yes! You can coat the wings in seasoned flour and refrigerate them up to 24 hours before frying-the longer rest actually improves coating adhesion. You can also prepare the sauce up to 3 days in advance and store it in the refrigerator; gently reheat before using. However, for the crispiest Hooters chicken wings, frying should happen as close to serving time as possible. If you must fry in advance, fry up to 2 hours ahead, keep warm in a 200°F oven uncovered, and toss in sauce just before serving.
Q: Why are my wings greasy instead of crispy?
A: Greasy Hooters chicken wings typically result from oil temperature issues. If your oil is too cool (below 325°F), wings absorb excessive oil. Use a thermometer and maintain 350-375°F throughout frying. Also ensure you’re not overcrowding the fryer-too many wings at once dramatically drops oil temperature. Finally, drain fried wings on a wire rack rather than paper towels; paper towels trap steam underneath, which softens the coating and makes wings greasy.
Q: What’s the difference between flats and drumettes, and does it matter?
A: Chicken wing “flats” (or wingettes) are the middle section with two bones, while “drumettes” are the mini-drumstick portion. Both are part of the whole chicken wing. Flats have more skin-to-meat ratio and get slightly crispier, while drumettes have more meat and are easier to eat. For authentic Hooters chicken wings, use both in equal proportions-this gives variety in texture and eating experience. Cooking time is the same for both pieces when they’re similar sizes.
Q: Can I make this recipe in an air fryer?
A: Yes! Air frying is an excellent method for how to cook Hooters chicken wings with less oil. After coating and refrigerating, arrange wings in a single layer in your air fryer basket (work in batches). Spray lightly with cooking oil. Cook at 380°F for 25-30 minutes, flipping halfway through, until golden and crispy. The coating won’t be quite as thick and crunchy as deep-fried, but you’ll still get delicious, crispy wings with significantly less fat. Toss in the butter-hot sauce mixture exactly as described.
Hooters Chicken Wings Recipe
There’s something irresistibly addictive about Hooters chicken wings-that perfect combination of crispy, golden skin enveloping juicy meat, all coated in a glossy, buttery hot sauce that’s just the right amount of spicy.
Ingredients
- 1.5 to 2 pounds chicken wings (separated into flats and drumettes)
- 1 teaspoon Adobo seasoning (or seasoned salt/Lawry’s)
- 1.5 cups all-purpose flour
- 2 teaspoons sea salt
- 1 teaspoon cayenne pepper
- 1 teaspoon paprika (smoked or sweet)
- 1 teaspoon black pepper
- 1 teaspoon garlic powder
- ¾ cup unsalted butter
- ½ cup hot sauce (Louisiana-style or similar; avoid Frank’s RedHot)
- 1 teaspoon black pepper
- 1 teaspoon garlic powder
- Vegetable, canola, or peanut oil (enough for deep frying, approximately 6-8 cups)
Instructions
Step 1: Prepare the Seasoned Flour
In a large mixing bowl, combine 1.5 cups all-purpose flour, 2 teaspoons sea salt, 1 teaspoon cayenne pepper, 1 teaspoon paprika, 1 teaspoon black pepper, and 1 teaspoon garlic powder. Whisk thoroughly until all the spices are evenly distributed throughout the flour. This seasoned flour mixture is crucial for creating that signature crispy coating on your Hooters chicken wings. Set the bowl aside while you prepare your chicken.
Step 2: Season the Chicken
Place your 1.5 to 2 pounds of cleaned, separated chicken wings (flats and drumettes) in a separate large bowl. Pat them dry with paper towels if they’re wet-this helps the seasoning adhere better. Sprinkle approximately 1 teaspoon of Adobo seasoning (or your preferred seasoned salt or Lawry’s) evenly over the wings. Toss and mix thoroughly with your hands to ensure every piece is coated. This pre-seasoning step ensures the meat itself is flavorful, not just the coating-a key detail in an authentic Hooters chicken wings recipe.
Step 3: Coat the Wings
Pour the prepared seasoned flour mixture over your seasoned chicken wings. Using clean hands, toss and mix aggressively, ensuring every single wing piece is completely coated with the flour mixture. Press the flour onto any bare spots. The flour should adhere well to the slightly moist surface of the chicken. Don’t be afraid to really work the flour into every crevice-this creates that thick, crispy coating that makes Hooters chicken wings so addictive.
Step 4: Rest in the Fridge
Cover the bowl of coated wings tightly with plastic wrap or transfer to a lidded container. Refrigerate for 1 to 1.5 hours. If you’re pressed for time, a minimum of 45 minutes will work, but longer is better. This resting period allows the flour coating to hydrate and adhere firmly to the chicken, preventing it from falling off during frying. The cold temperature also helps the coating set, resulting in a crispier final texture when the wings hit the hot oil.
Step 5: Prepare the Sauce
While your wings are chilling, make the iconic sauce. In a medium saucepan over low to medium heat, melt ¾ cup unsalted butter completely. Once melted, add ½ cup hot sauce (Louisiana-style works beautifully-avoid Frank’s RedHot as it already contains butter and will alter the balance), 1 teaspoon black pepper, and 1 teaspoon garlic powder. Stir the mixture gently to combine all ingredients. Allow it to simmer very gently for 3-5 minutes to let the flavors meld together-do not let it boil vigorously. Remove from heat and pour into a large, wide bowl that’s big enough to toss all your wings later. Keep warm but not hot.
Step 6: Fry the Wings
Fill your deep fryer or large heavy-bottomed pot with enough oil to submerge the wings (about 3-4 inches deep). Heat the oil to 350-375°F-use a cooking thermometer for accuracy. Remove wings from the refrigerator. Working in batches to avoid overcrowding (which drops oil temperature and creates soggy wings), carefully lower 5-7 wing pieces into the hot oil using tongs. Fry for 7-10 minutes for smaller wings, or up to 12-14 minutes for larger pieces. You’ll know they’re done when they’re deeply golden brown, crispy, floating to the surface, and have reached an internal temperature of 165°F. Remove with a slotted spoon or tongs and place on a wire cooling rack set over a baking sheet to drain excess oil. Keep finished wings warm in a 200°F oven while you fry the remaining batches.
Step 7: Toss in Sauce
Once all your Hooters chicken wings are fried and still hot, place them all into the large bowl containing your warm butter-hot sauce mixture. Using tongs or by carefully shaking the bowl (cover with a lid or plate if doing this), toss the wings vigorously to coat each piece completely in the glossy, buttery sauce. The sauce should cling to the crispy coating, creating that signature sticky-yet-crispy texture. Work quickly while the wings are still hot-the heat helps the sauce adhere better.
Step 8: Serve
Transfer your perfectly sauced Hooters chicken wings to a serving platter immediately. Serve hot alongside classic accompaniments like celery sticks, carrot sticks, and ranch or blue cheese dressing for dipping. The wings are best enjoyed fresh and hot, when the coating is at its crispiest and the sauce is still warm and glossy. Don’t forget plenty of napkins-these are gloriously messy in the best possible way!
Notes
Store leftover Hooters chicken wings in an airtight container in the refrigerator for up to 3 days. For how to reheat Hooters chicken wings while maintaining crispiness, place on a wire rack over a baking sheet and reheat in a 375°F oven for 12-15 minutes. Alternatively, use an air fryer at 350°F for 6-8 minutes. Never microwave, as it destroys the crispy coating.
Nutrition Information:
Yield:
6Serving Size:
1Amount Per Serving: Calories: 280
Understanding how to cook Hooters chicken wings properly means paying attention to details like refrigeration time, oil temperature, and sauce consistency, but the results are absolutely worth the effort. Whether you’re hosting game day, celebrating with friends, or simply indulging a craving, these crispy, flavorful wings deliver that addictive combination of textures and tastes that keeps people coming back.
Now you know exactly how to reheat Hooters chicken wings too, ensuring even leftovers maintain their delicious quality. Get ready to become the wing master among your friends!
I’d love to hear your thoughts-leave a comment on the blog and let me know How it came out! Don’t forget to follow me on Pinterest, Facebook and YouTube for more delicious updates. Your support truly means everything to me.